- +4527976587
- mail@worldofshortgame.com

Drills and games

Better contact in the bunker with this simple drill
Improve Your Golf Bunker Shots with This Simple Drill
When it comes to golf, bunker shots can be intimidating for many players. The key to success in the bunker is having solid contact and control. In this article, we’ll cover a simple but effective golf bunker drill that can significantly improve your sand play by focusing on contact precision. This technique, shared by Nikola Ceci, can help you practice and perfect your bunker shots, making sure you hit cleanly through the sand and get the ball out consistently.
Step 1: Setting Up the Drill
To begin, the drill is straightforward and only requires a few golf balls and a practice bunker. Here’s how to set it up:
- Draw a Line in the Sand: First, use your club to draw a straight line in the sand. This line serves as a reference point, ensuring you focus on where the club should first make contact with the sand.
- Place Four Balls at Different Distances: Next, place four balls in front of the line, each positioned at slightly different distances:
- The first ball should be just 1 centimeter in front of the line.
- The second ball should be placed 3 centimeters in front.
- The third ball should be 7 centimeters away from the line.
- The fourth ball should be placed a bit further, allowing you to practice various contact points.
By arranging the balls at different distances, you’ll be able to get a better feel for how much sand to take and when you’re making solid contact with the ball.
Step 2: Performing the Drill
The aim of this drill is to hit each ball while ensuring that your club contacts the line in the sand first. This focus on the line ensures you’re hitting behind the ball and utilizing the sand to lift the ball out of the bunker.
- Hit the Line First: As you swing, aim to have your club hit the line in the sand before making contact with the ball. This will teach you to enter the sand at the correct point, which is crucial for solid bunker shots.
- Evaluate Each Shot: After hitting each of the four balls, evaluate how it felt. Did you hit the sand too early or too late? Did you manage to hit the ball cleanly and control its flight? Identifying how each shot feels and adjusting your swing accordingly is critical for improving your consistency in the bunker.
Step 3: Analyze Your Results
Once you’ve completed the drill, it’s time to analyze the results of your shots. Nikola Ceci walks through the results of his practice to help golfers understand what they should be looking for:
- First Shot: In this example, the first shot was thinned because the club didn’t hit the sand before the ball. This led to poor contact and an uncontrolled flight.
- Second Shot: The second shot was much better, with contact slightly before the line. This resulted in a clean strike and the best overall ball flight.
- Third Shot: In this case, the club took too much sand, causing the ball to lose power and accuracy.
- Fourth Shot: Too much sand was taken once again, leading to poor contact and an ineffective shot.
By experimenting with different sand depths and swing mechanics, you’ll begin to recognize the ideal amount of sand to take for your bunker shots.
Why This Drill Works
The beauty of this drill lies in its simplicity. By practicing hitting the sand at different points relative to the ball, you begin to develop a natural feel for proper contact. Over time, you’ll learn how to:
- Take the Correct Amount of Sand: Bunker shots are all about controlling how much sand you take. This drill helps you become comfortable with the concept of hitting the sand first and controlling the depth of your shot.
- Improve Consistency: Regularly practicing this drill will improve your consistency in the bunker. With repetition, you’ll develop a more reliable technique for making clean contact with the ball.
- Build Confidence: The more comfortable you get with hitting out of bunkers, the more confidence you’ll have when faced with these tricky shots on the course.
Practical Tips for Bunker Success
While this drill is designed to improve your contact and feel in the bunker, here are a few additional tips to keep in mind:
- Open the Clubface: When playing bunker shots, always ensure that your clubface is slightly open at address. This will help you engage the bounce of the club and prevent the club from digging too deeply into the sand.
- Wider Stance: Take a wider stance to stabilize your body. This helps you swing through the sand with better balance and control.
- Accelerate Through the Sand: One of the most common mistakes golfers make is decelerating as they enter the sand. Instead, focus on accelerating through the sand to maintain control and give the ball enough lift.
Conclusion
Practicing bunker shots can be challenging, but using simple, effective drills like this one can make a significant difference. With regular practice, you’ll develop a better feel for how to take the right amount of sand and hit cleaner shots. By focusing on where the club hits the sand in relation to the ball, you can transform your bunker play and gain more confidence in these difficult shots.
Next time you find yourself in the bunker, remember this drill, and give it a try. You’ll quickly see improvements in your contact and flight control, setting you up for better results on the course.
Good luck with your bunker practice!

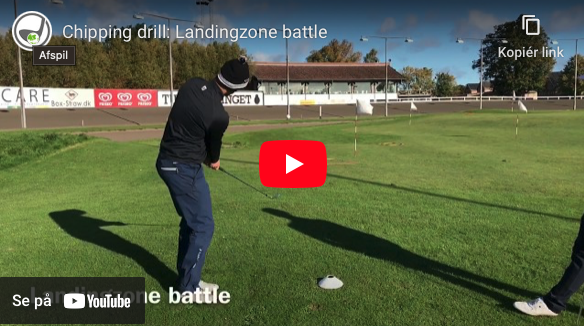
Chipping drill: Landingzone game
Chipping drill: Hit your landingspot
The importance of being able to hit your landingspot when chipping is HUGE! If you cannot control where you land the ball when chipping into the green, you have no chance of hitting the ball close to the hole repeatedly.
The following drill / game improves your ability to hit your landingspot. You can do it alone, compete 1-vs-1 with your partner, or compete in larger groups.
How to do it
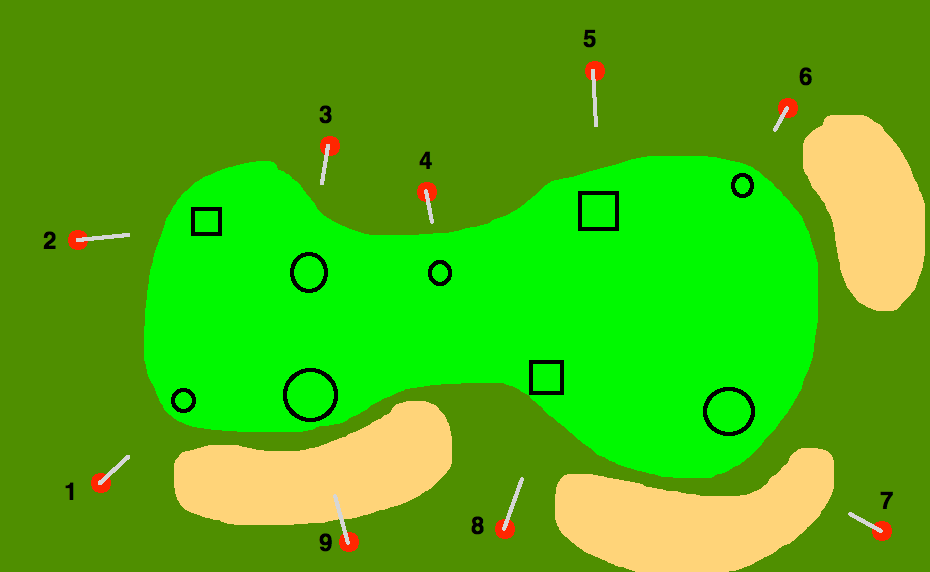
Make 9 holes/shots around a green. The shots/holes must be in different lengths, from different surfaces with different lies. The landing zones may also vary according to the length of the hole. (see picture below)

You can use clubs, lines, tees, flagsticks etc. to create the landingszone.
The chipping drill
If you play against a partner, hit 1 shot each, on each hole. Landing the ball within the zone (in carry, the ball doesn’t have stay in the zone, just hit the ground for the first time within the zone) you get 1 point. The player with the most points when the game is over is the winner. You can either just play 1 or 2 rounds (9 or 18 holes) or you can play as following:
In round 1 you must use whatever club you want on each shot.
In round 2 you must bring along 3 different clubs (ex. 50, 55 and 60 degrees wedge). Before each hole you have to roll a dice. If you hit 1 or 2 with the dice, use the lowest lofted club (50 degrees). If you hit a 3 or 4, you must use the club with the middle amount of degrees (55 degrees). If you hit a 5 or 6 with the dice, use the club with the most degrees (60 degrees).
In round 3 you must choose one club, only one, that you use for all the holes.
The player who has scored the most points (hit most zones) in all three rounds has won.
Enjoy your practice, and let the best man win! ;)


