- +4527976587
- mail@worldofshortgame.com

Blog

Better contact in the bunker with this simple drill
Improve Your Golf Bunker Shots with This Simple Drill
When it comes to golf, bunker shots can be intimidating for many players. The key to success in the bunker is having solid contact and control. In this article, we’ll cover a simple but effective golf bunker drill that can significantly improve your sand play by focusing on contact precision. This technique, shared by Nikola Ceci, can help you practice and perfect your bunker shots, making sure you hit cleanly through the sand and get the ball out consistently.
Step 1: Setting Up the Drill
To begin, the drill is straightforward and only requires a few golf balls and a practice bunker. Here’s how to set it up:
- Draw a Line in the Sand: First, use your club to draw a straight line in the sand. This line serves as a reference point, ensuring you focus on where the club should first make contact with the sand.
- Place Four Balls at Different Distances: Next, place four balls in front of the line, each positioned at slightly different distances:
- The first ball should be just 1 centimeter in front of the line.
- The second ball should be placed 3 centimeters in front.
- The third ball should be 7 centimeters away from the line.
- The fourth ball should be placed a bit further, allowing you to practice various contact points.
By arranging the balls at different distances, you’ll be able to get a better feel for how much sand to take and when you’re making solid contact with the ball.
Step 2: Performing the Drill
The aim of this drill is to hit each ball while ensuring that your club contacts the line in the sand first. This focus on the line ensures you’re hitting behind the ball and utilizing the sand to lift the ball out of the bunker.
- Hit the Line First: As you swing, aim to have your club hit the line in the sand before making contact with the ball. This will teach you to enter the sand at the correct point, which is crucial for solid bunker shots.
- Evaluate Each Shot: After hitting each of the four balls, evaluate how it felt. Did you hit the sand too early or too late? Did you manage to hit the ball cleanly and control its flight? Identifying how each shot feels and adjusting your swing accordingly is critical for improving your consistency in the bunker.
Step 3: Analyze Your Results
Once you’ve completed the drill, it’s time to analyze the results of your shots. Nikola Ceci walks through the results of his practice to help golfers understand what they should be looking for:
- First Shot: In this example, the first shot was thinned because the club didn’t hit the sand before the ball. This led to poor contact and an uncontrolled flight.
- Second Shot: The second shot was much better, with contact slightly before the line. This resulted in a clean strike and the best overall ball flight.
- Third Shot: In this case, the club took too much sand, causing the ball to lose power and accuracy.
- Fourth Shot: Too much sand was taken once again, leading to poor contact and an ineffective shot.
By experimenting with different sand depths and swing mechanics, you’ll begin to recognize the ideal amount of sand to take for your bunker shots.
Why This Drill Works
The beauty of this drill lies in its simplicity. By practicing hitting the sand at different points relative to the ball, you begin to develop a natural feel for proper contact. Over time, you’ll learn how to:
- Take the Correct Amount of Sand: Bunker shots are all about controlling how much sand you take. This drill helps you become comfortable with the concept of hitting the sand first and controlling the depth of your shot.
- Improve Consistency: Regularly practicing this drill will improve your consistency in the bunker. With repetition, you’ll develop a more reliable technique for making clean contact with the ball.
- Build Confidence: The more comfortable you get with hitting out of bunkers, the more confidence you’ll have when faced with these tricky shots on the course.
Practical Tips for Bunker Success
While this drill is designed to improve your contact and feel in the bunker, here are a few additional tips to keep in mind:
- Open the Clubface: When playing bunker shots, always ensure that your clubface is slightly open at address. This will help you engage the bounce of the club and prevent the club from digging too deeply into the sand.
- Wider Stance: Take a wider stance to stabilize your body. This helps you swing through the sand with better balance and control.
- Accelerate Through the Sand: One of the most common mistakes golfers make is decelerating as they enter the sand. Instead, focus on accelerating through the sand to maintain control and give the ball enough lift.
Conclusion
Practicing bunker shots can be challenging, but using simple, effective drills like this one can make a significant difference. With regular practice, you’ll develop a better feel for how to take the right amount of sand and hit cleaner shots. By focusing on where the club hits the sand in relation to the ball, you can transform your bunker play and gain more confidence in these difficult shots.
Next time you find yourself in the bunker, remember this drill, and give it a try. You’ll quickly see improvements in your contact and flight control, setting you up for better results on the course.
Good luck with your bunker practice!
Chipping drill: Landingzone game
Chipping drill: Hit your landingspot
The importance of being able to hit your landingspot when chipping is HUGE! If you cannot control where you land the ball when chipping into the green, you have no chance of hitting the ball close to the hole repeatedly.
The following drill / game improves your ability to hit your landingspot. You can do it alone, compete 1-vs-1 with your partner, or compete in larger groups.
How to do it
Make 9 holes/shots around a green. The shots/holes must be in different lengths, from different surfaces with different lies. The landing zones may also vary according to the length of the hole. (see picture below)
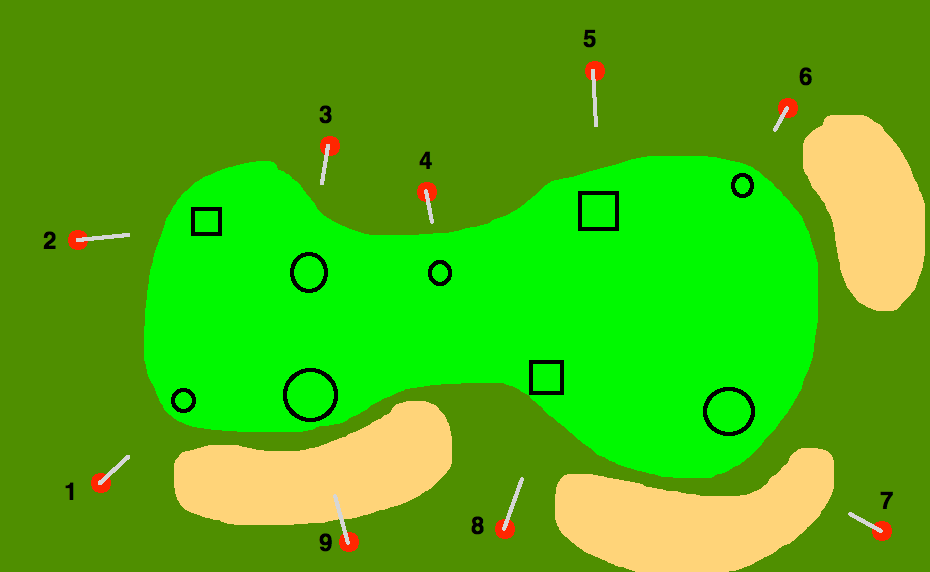
You can use clubs, lines, tees, flagsticks etc. to create the landingszone.
The chipping drill
If you play against a partner, hit 1 shot each, on each hole. Landing the ball within the zone (in carry, the ball doesn’t have stay in the zone, just hit the ground for the first time within the zone) you get 1 point. The player with the most points when the game is over is the winner. You can either just play 1 or 2 rounds (9 or 18 holes) or you can play as following:
In round 1 you must use whatever club you want on each shot.
In round 2 you must bring along 3 different clubs (ex. 50, 55 and 60 degrees wedge). Before each hole you have to roll a dice. If you hit 1 or 2 with the dice, use the lowest lofted club (50 degrees). If you hit a 3 or 4, you must use the club with the middle amount of degrees (55 degrees). If you hit a 5 or 6 with the dice, use the club with the most degrees (60 degrees).
In round 3 you must choose one club, only one, that you use for all the holes.
The player who has scored the most points (hit most zones) in all three rounds has won.
Enjoy your practice, and let the best man win! ;)
Better chipping with an open clubface
Better chipping with an open clubface
Do you struggle with bad contact in you chipping! This will help you a lot!
Open up the clubface in the backswing
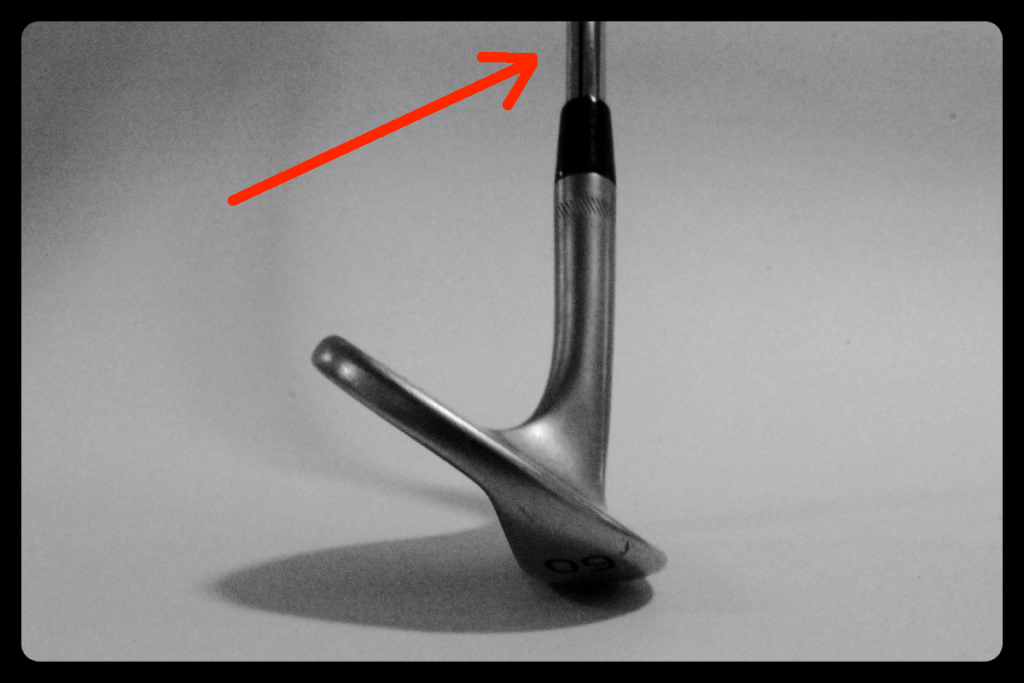
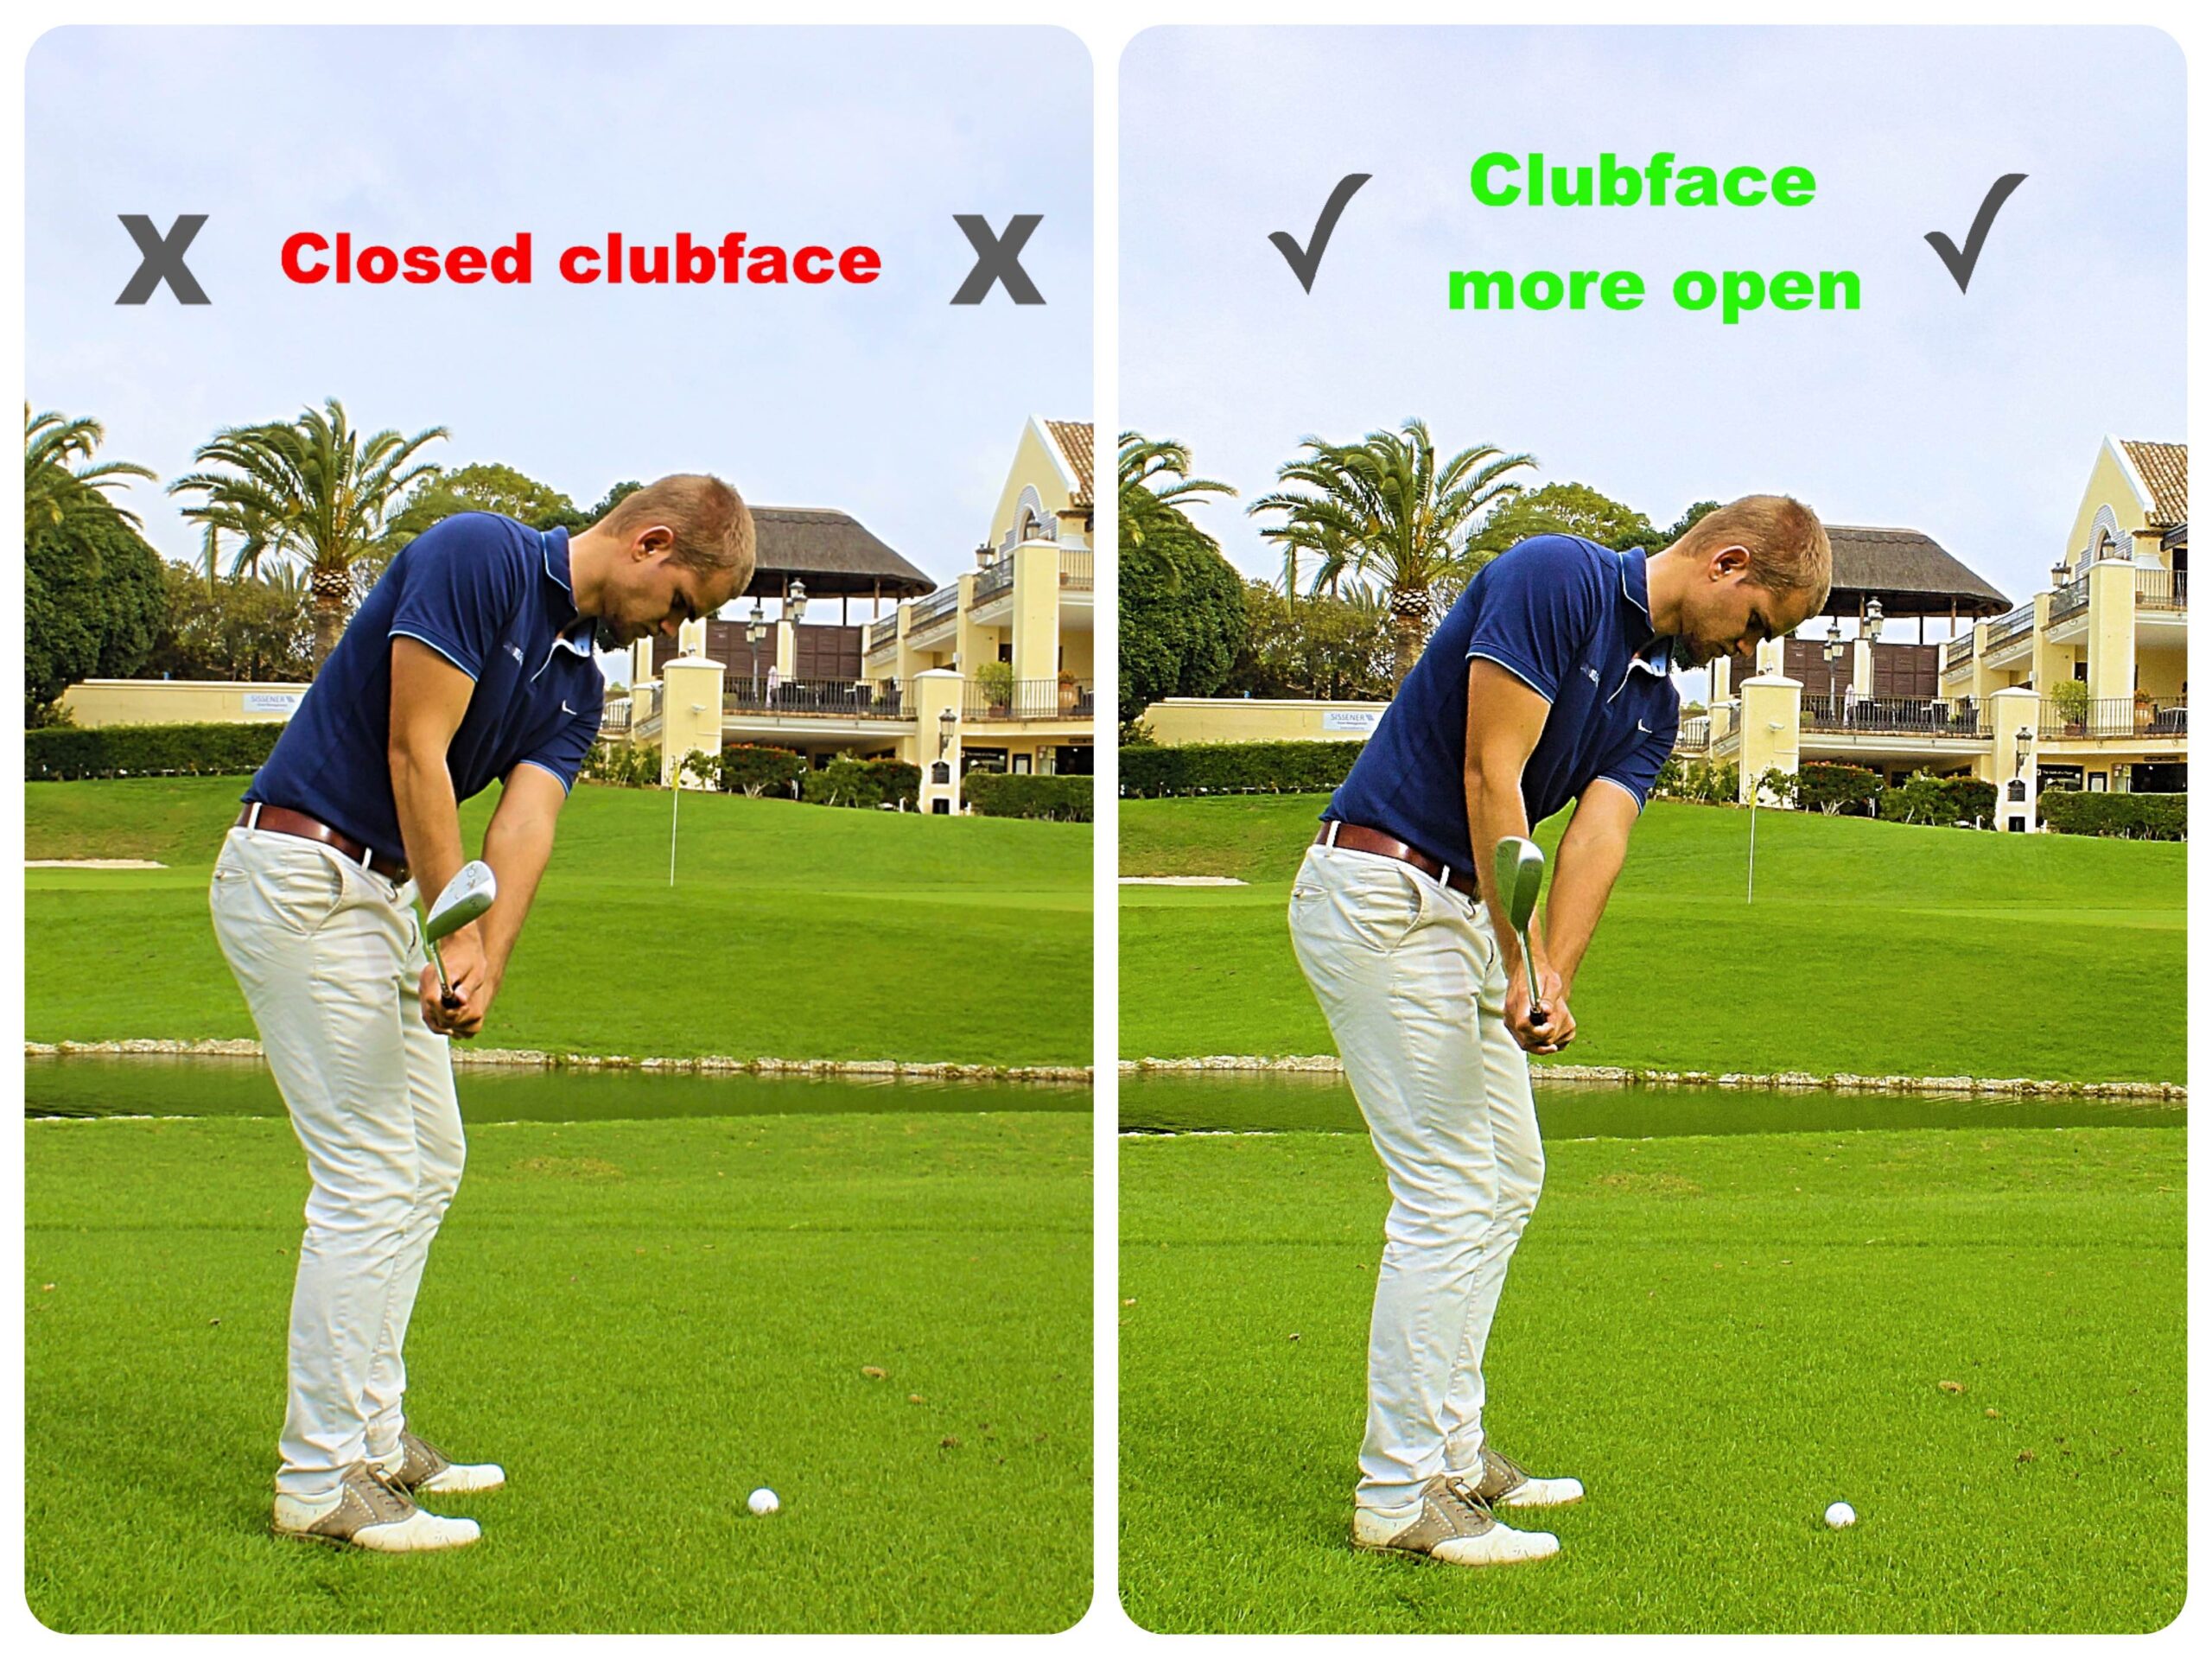
One of the most important factors in a good chip is the way which the clubface points in the backswing. When the shaft is parallel with the ground in the backswing, we would like to see the the clubface has been allowed to “open” so that the “leading edge” is aiming up in the air (see picture 1). In this way we use the club properly, and ensures the greatest chance of the club sliding over the grass as we make contact with the ground.
 Picture 1
You are allowed to “release” the club
Additionally, an open clubface allows you to “release” the club in the downswing and follow-through. This means that you let the weight of the clubhead swing freely down towards the ball, rather than “steering” the clubhead by tightening you muscles in the underarms. It’s a good thing to “release” the club when you chip, because this helps the club to slide over the ground rather than digging into the grass.
No more “digging”
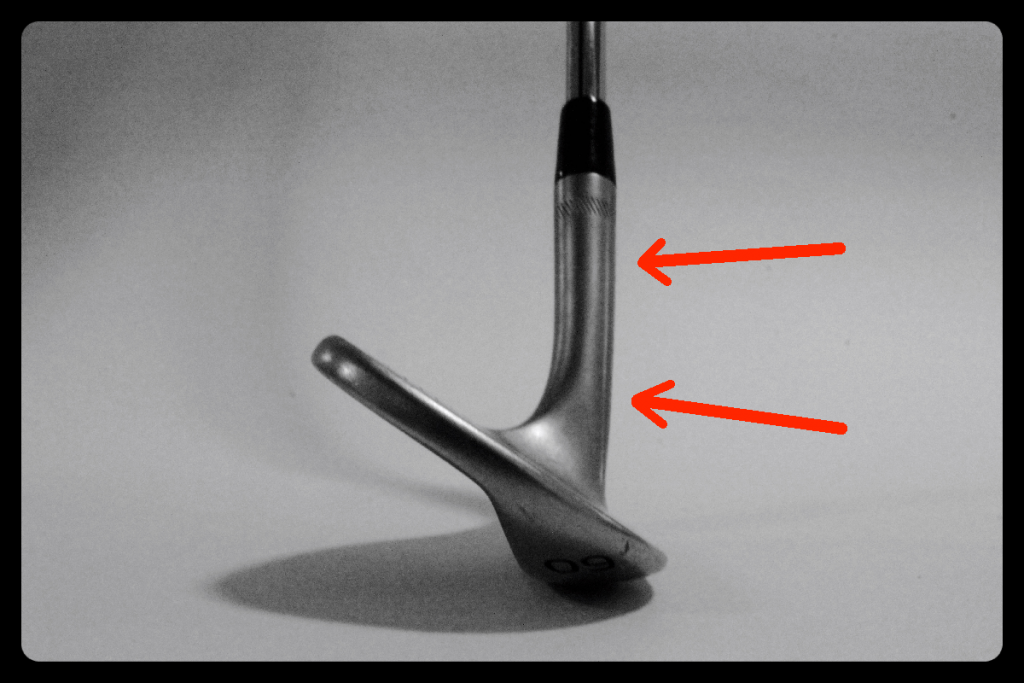
When the clubhead is closed in the backswing (see picture 2), the sharp front edge of the clubface, “leading edge”, is likely to burst into the grass, making it very difficult to hit a good chip. This can be avoided by opening the clubface in the backswing

How is it checked?
Place yourself in front of a mirror or use your phone to record a video of your chip. Use picture 1 and picture 2 to compare with. The key is in the lead wrist (left wrist for a right-handed player). Study the 2 pictures closely and look at how this wrist is placed/shaped.
Amazing footage of Brett Rumford during a bunker practice
Watch these 5:30 minutes of bunkerplay heaven!
This is one of the best ever bunker practice sessions ever seen!
Brett Rumford, a European Tour player, former PGA Tour Player, and many time winner on several of the best professional tours, is known to be one of the best bunkerplayers in the world.
His overall Short Game is amazing and therfor he is also known as Mr. Short Game on the European Tour. At the Nordea Masters at Barsebäck G&C Club, 2017, Brett had a little bunker practice session after his round. After hitting 2 minutes non-stop “gimmies” from the sand, I thought it would be cool to record the master in action, and it ended up with a 5:30 minute video. Here it is, enjoy:
What can be learned from this video?
I won’t be going into very specific details about the technique (Watch this video to learn more about Brett Rumford’s bunker setup). The camera angle is way off and does not allow a lot of detailed swing-analysis, but that wasn’t either the point with the video. But I take notice of a few things in the video:
Listen and learn
Turn up the sound and listen when the ball is hit. It’s like an explosion in the sand. This “explosion” comes from the bounce (learn more about the bounce here) being smashed into the sand with quite a lot of speed.
Fly it
The first 3:50 minutes the shots are hit to a flag in the back end of the green. A common thought for a pin-position like that, with that much green to work with in front of the pin, would be to let the ball roll the way up to the pin, instead of flying it all the way. But that is indeed not what Mr. Rumford is doing. Most of the shots lands a few meters in front of the pin, take one bounce and then checks up beside the pin. So why would he fly the ball all the way to the pin? Off cause no-one can know except himself, but my guess would be these reasons:
A lower releasing/running bunkershot will require less loft on the club, which would decrease the bounce, and therefor make the contact more difficult.
A such good player is used to see the ball fly with a certain known flight (height/trajectory) and with that flight distance control is easiest. So why chance the flight, and make distance controle harder because of an unfamiliar trajectory?
It’s smooth!
Every shot is hit with a smooth acceleration of the club through the ball.
Watch the rhythm and tempo of the swings. It looks so smooth, relaxed, soft, and in sync. There is absolutly no tension, and everything seems to perfectly harmonized.
Use the video as inspiration to your own bunkerplay. Watch it and enjoy every second of it. This is how bunkershots should be played.
All the best luck from the sand!
-World Of Short Game – Nicolai Cetti
If you need help with your bunkerplay, or other parts of the Short Game, you can order your Online Lesson right here!
It should be made clear that World Of Short Game and Nicolai Cetti has no relation to Brett Rumford. This is video recorded from “outside” the ropes.
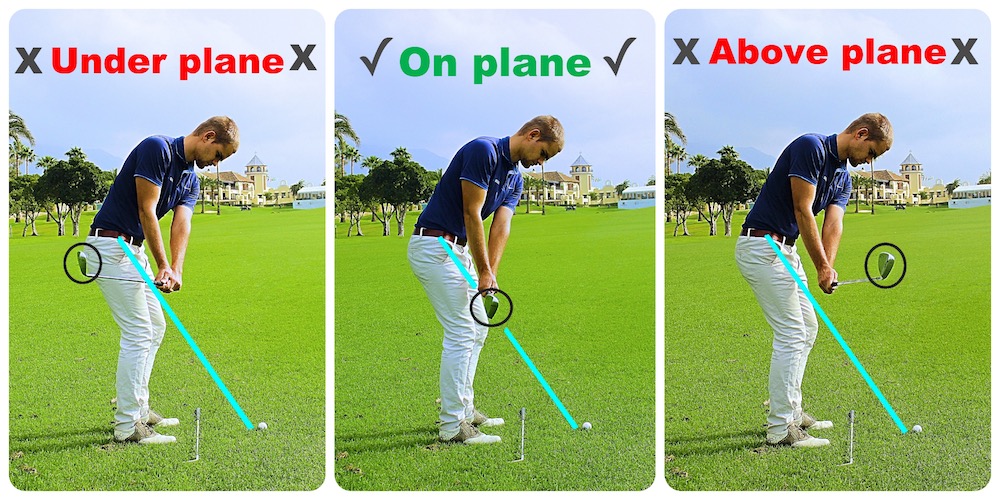
Swing on plane and hit better chip and pitch shots
Swing on plane and hit better chip and pitch shots
Do you have difficulties with the contact of your chip or pitch shots? Then it is likely that the way you swing the club back and forth causes theses problems.
What is the swing plane?
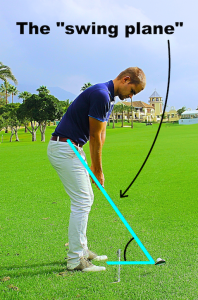
The swing planet is the “way” we would like to swing the club when chipping and pitching. The swing plane is the angle the shaft creates at setup. (see Figure 1). Exactly what this angle depends on many things and are not the essential. The essential thing is that the club head moves along this plane in the backswing, and on the way down again.
Why is it important to swing on plane?
There are several benefits that comes along with swinging on plane:
- The contact with the ball will be easier.
- You are much more likely to use the club properly if you swing on plane. A wedge is designed to help you if you hit a bit too early in the ground, and this help is reduced if you do not swing the club right back and forth.
- You have greater chance of being creative with your chip and pitch shots. With creativity I mean changing the height of the shot, and how much spin you hit.
- Unfortunately, the lie is not always perfect when chipping or pitching, and you need to be able to adapt to this. If you swing the club on plane, you have way better chances to adapt your swing to fit the many different lies you get when playing golf.

How do you know if you swing on plane?
There are several ways to check your own chipping and pitching motion. The easiest way is to use your phone, which is likely to have a camera built-in.
- Place a club on the ground pointing straight at your target and put yourself so the club is between your feet and the ball (see Figure 1)
- Get a friend to hold the camera so it is located in the same line as the club lying on the ground.
- Compare the recorded video and see how the club head moves back and forth. Use picture 2, 3 and 4 as reference points.
Golf Chip Challenge
Golf Chip Challenge
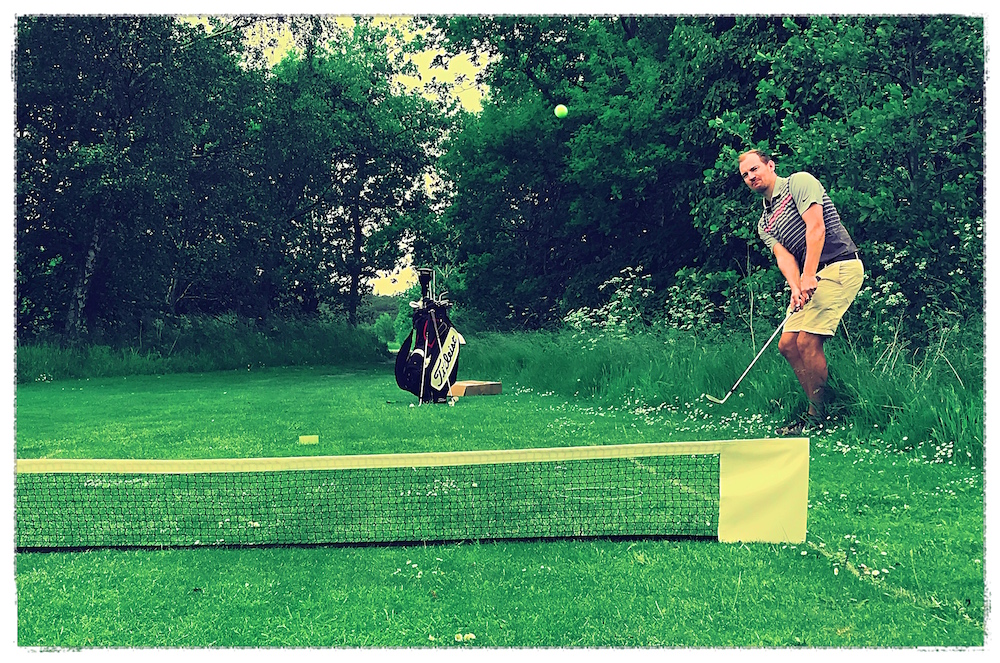
Golf Chip Challenge is a game that PGA Professional Rene Wiesel has designed. The game can improve your Short Game, through fun and different practice.
What can it do?
After playing the game a number of times with many different groups of players, I only have positive things to say about the game. It’s incredibly fun to play and you can easily spend hours playing it. You can either play 1 against 1, or you can play in teams, like when playing a foursome.
The game is very good for practicing hitting your landing-spot, which is one of the most important skills to have in the “Short Game”.
After playing the game more and more times, one begins to develop different tactics and different game formats that can make it even more fun and challenging to play.
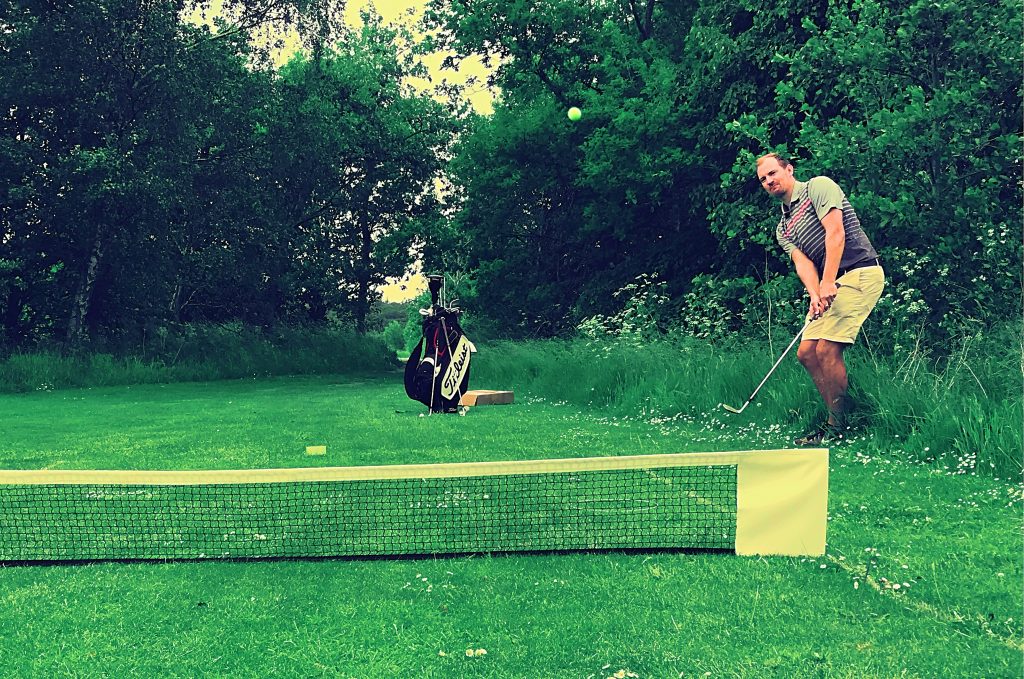
Who can play it?
The game is designed so that players of any kind of skill level can play, even beginners will have fun with the game. In addition, players of different levels can play against each other by having different sizes of landing zones.
Where can you play it?
The game can be played anywhere with a little space and some grass. The backyard, the golf course, the park, the possibilities are many as long as there is a piece of grass.

Where can you buy it?
The game can be purchased through the following website:
http://karstenmaas.dk/golfchip%20challenge.html
Additionally, you can follow the game’s Facebook page:
https://m.facebook.com/Golfchipchallenge-1429263763971001/
A huge thanks to Rene Wiesel for sending me this, this is an awesome product and a game we will be using a lot in the future!
“As a player and coach, I have a VERY STRONG love for the Short Game of golf, and the Golf Chip Challenge game is an amazing and fun game that anyone can use, and everyone will have great joy and benefit from playing it” – Nicolai Cetti

Learn how Ernie Els hits a TON of backspin!
Learn how Ernie Els hits a TON of backspin!
Backspin is something all love, but not everyone can do it. Using Ernie Els as a model, Nicolai Cetti will highlight some of the basic movements he is making, in order to create a lot of backspin when hitting small wedge shots.

5 simple bunker setup fundamentals with Brett Rumford
5 simple bunker setup fundamentals with Brett Rumford
A bunker is usually a great place to be for a professional player. From the sand the ball-control is often really good, and this gives them a really good chance of hitting the ball close to the hole.
With Brett Rumford, European Tour player and one of the best bunker-players in the world as a model, I will point out 5 key elements in his setup, which you can use in you own game the next time your on the course.

Your Mindset – 6 tips to better habits
Your Mindset – 6 tips to better habits
How you choose to react in a given situation, says a lot about you as a golfer, but also as an human being. Here are 6 tips for better mental habits, and the theory behind.
The Mindset Theory is based upon behavioral psychology, and deals with why people choose as they do in given situations.
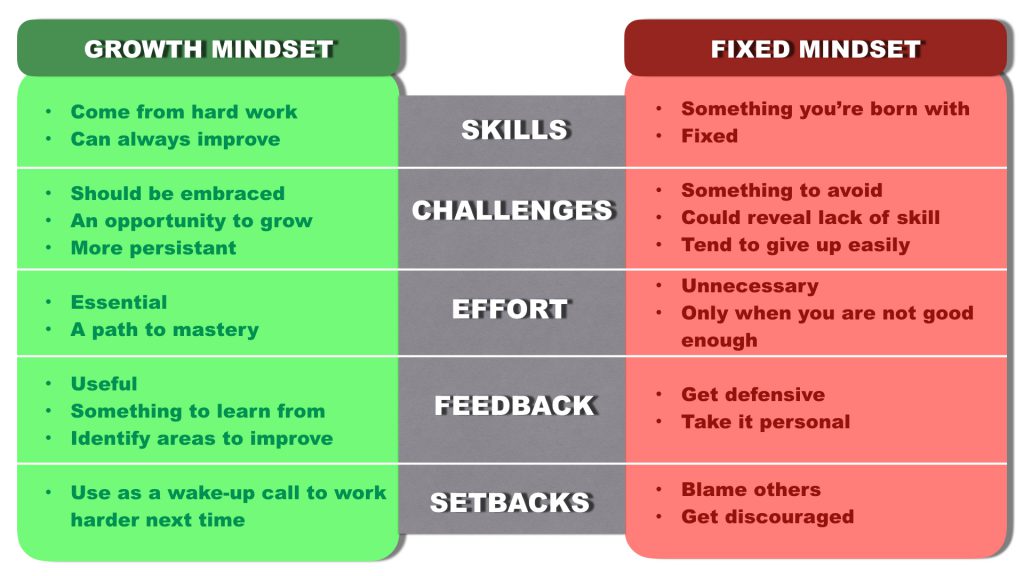
Research has shown that people can have two different mindsets. The Growth and the Fixed.
The Fixed Mindset
People with the fixed mindset, believe the talent and skills are a constant size, which can’ot be change. You have a certain amount of talent and abilities, which one has to live with forever. Athletes with this mindset often have a great need to show themselves as better than others, and therefore they never reach their full potential because they constantly need to “protect” their status as being better than the others.
The Growth Mindset
People with an open mindset; believe that talent and skills are a changing size that can be developed throughout life, through hard work and training. These people believe that behind every performance there is a major work ethic.
Most of the world’s greatest athletes, Michael Jordan, Jackie Joyner-Kersee, Tiger Woods, Mia Hamm, Pete Sampras, have or have had the growth-mindset. None of these athletes have come easy to their performance; they have worked hard, and achieved what they have throughout focused training, and constant analysis of their performance and weaknesses.

Advantages of the Growth mindset
Research has shown that a growth mindset creates a healthy approach to learning and training. People with this mindset are much more susceptible to feedback and they have a much greater ability to deal with adversity. And last but not least – the growth mindset reaches a much higher performance level in the long term.
The mindset is incredibly important, both on the golf course, but also in life as general. If you want to see which set of thoughts you walk around with, check out which beliefs you have in the table below.
Do you want to live with a growth-mindset?
The mindset theory is not just a theory; it’s an approach to life. If you have the desire and the courage to live with the growth mindset, then I’m sure you can. It requires hard work and determination, but we can all do it!
6 tips to live with a growth-mindset
- Use words that I will, I can, that sounds exciting, well done, great job, well fought, and so on.
- Appreciate the effort – the work – and not the result.
- Chose the difficult option – that’s were you can learn the most.
- When you are facing a difficulties and setbacks, think of it as an opportunity for you to learn and improve.
- When people give you criticism and feedback – thank them; they have just helped you to identify areas for improvement.
- Doing great is not when you can do something with no mistakes, and finish quickly. Doing great is when you really work hard to do a task and when you keep trying even though you are struggling to find a solution.
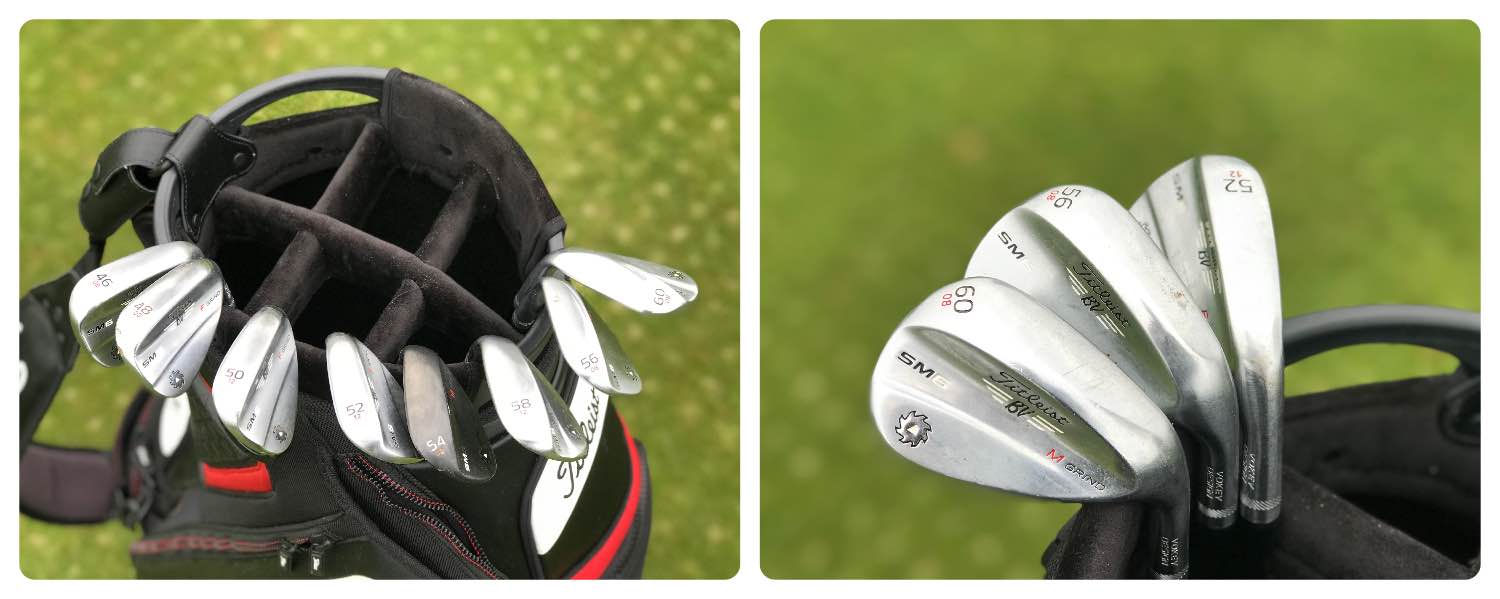
11 Golf Wedge Parts You Must Know
11 Golf Wedge Parts You Must Know
Do you know what bounce angle, the sole or the grind are, on a golf wedge? If not, keep on reading, and find out!
The golf wedge is designed in a very specific way, in order to help the player the most. In the following I will describe the different parts of a wedge, and what their function is.
1. Shaft
The shaft is the part that connects your hands with the club head. The shaft may vary in the type (steel or graphite shaft), the length, the weight, stiffness (flex), and where the shaft flexes (kick point).
2. Ferrule
This is just the little black plastic piece that sits where the club head stops and the shaft starts. It has no function, but is simply a visual part of the club. Some club-builders offer ferrules in costume colors! ;) 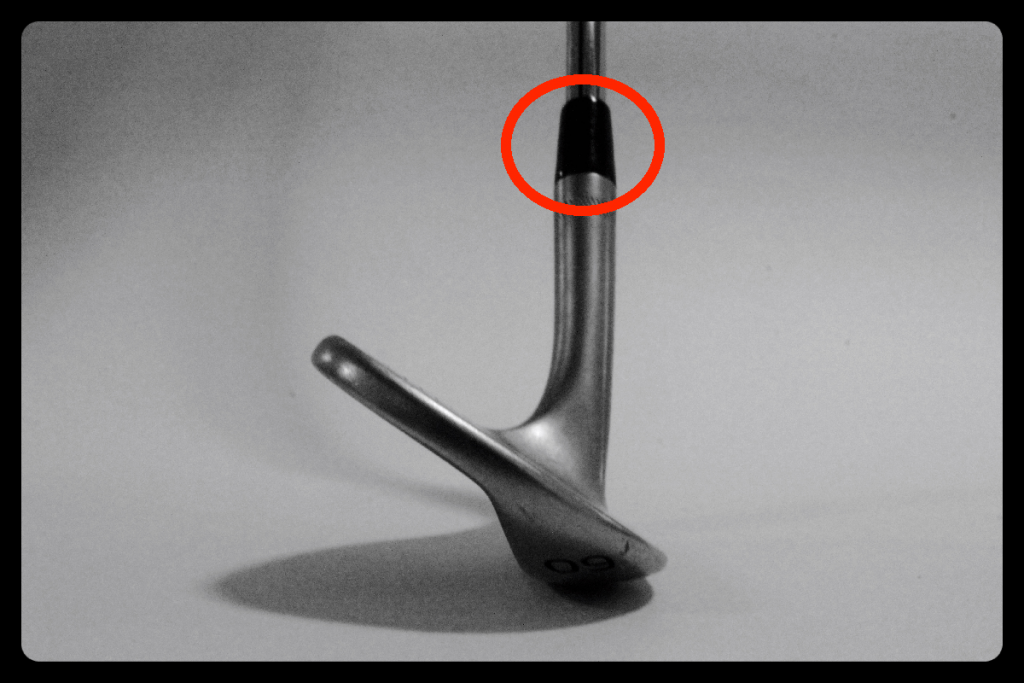
3. Hosel
This is the part of the club head wherein the shaft is mounted. This is the part of the club were the ball is strucked when hitting a shank. The companies behind wedges experiments with different hosel length, to change the clubs performance.
4. Loft
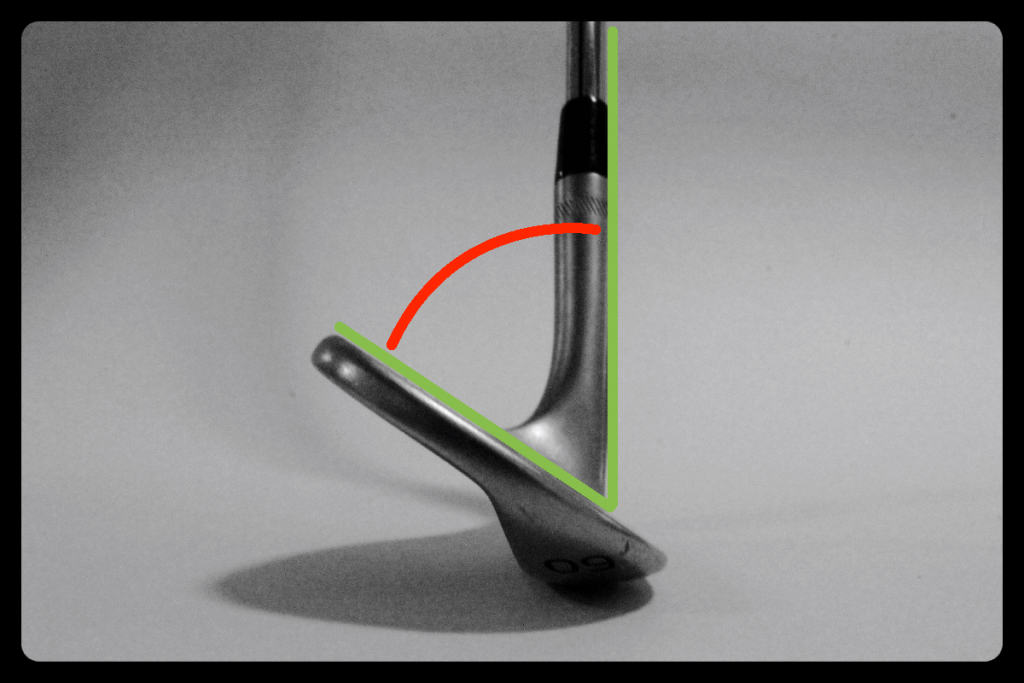
The loft on a wedge is the angle of the clubface relative to the shaft. The angle is measured when the shaft is vertical relative to a horizontal surface. This angle has an impact on how high and far you can hit the wedge.
5. Lie
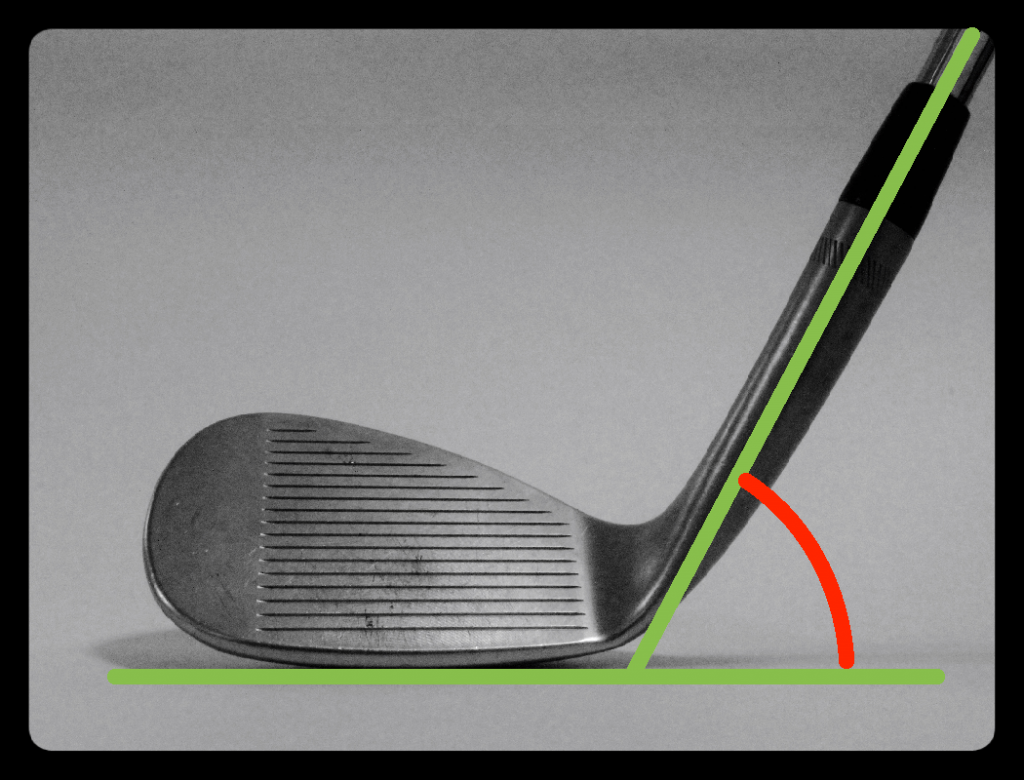
The lie angle of a wedge is the club head’s horizontal orientation relative to the shaft. The lie must fit every individual player because it has a huge importance to the direction of the shot.
6. Bounce angle
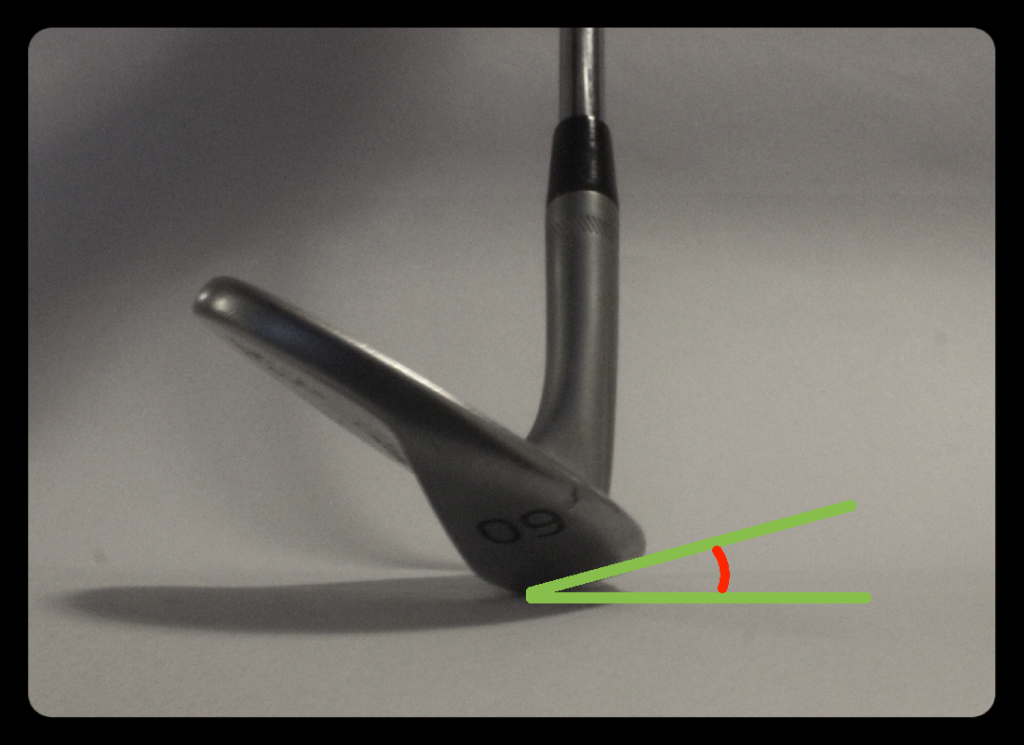
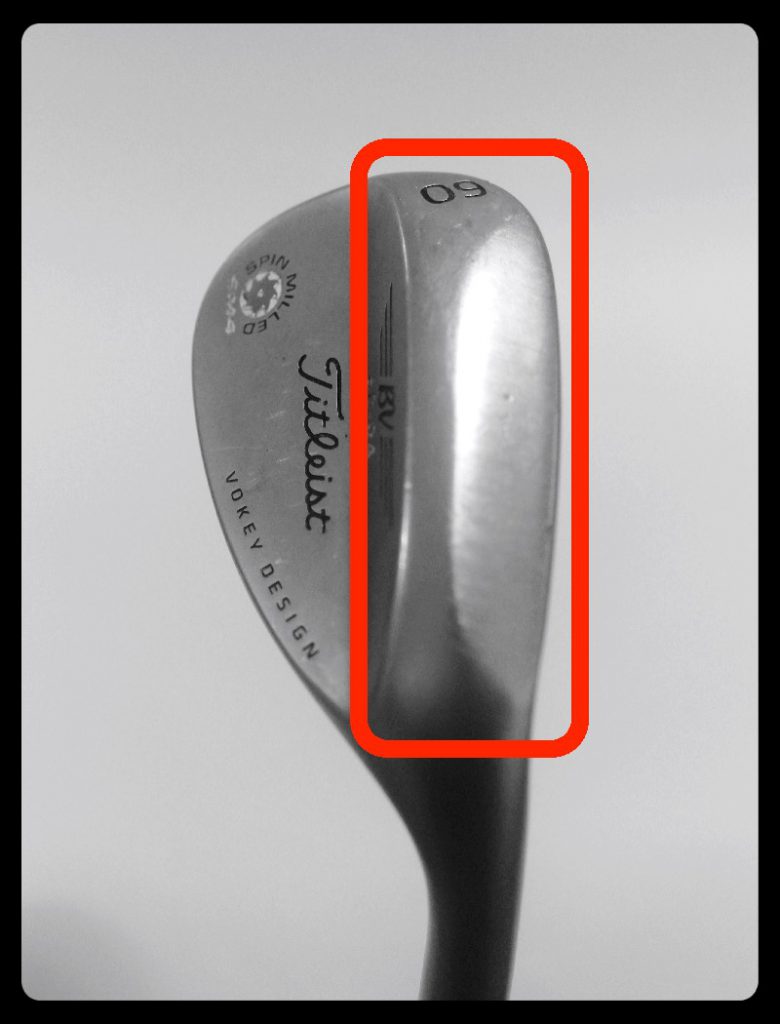
Bounce is an angle every wedge has. This angle is measured when the shaft is vertical, and with the club head positioned on a horizontal surface. The angle between the horizontal surface and the leading edge (see below) is the bounce angle. This angle serves to prevent the club from digging into the ground or in the sand. It would be enormously difficult to get solid contact on a short game shot without this angle. 4-degree of bounce is very little, and 15 degrees bounce is very high compared with the wedges that are sold today.
7. Leading edge
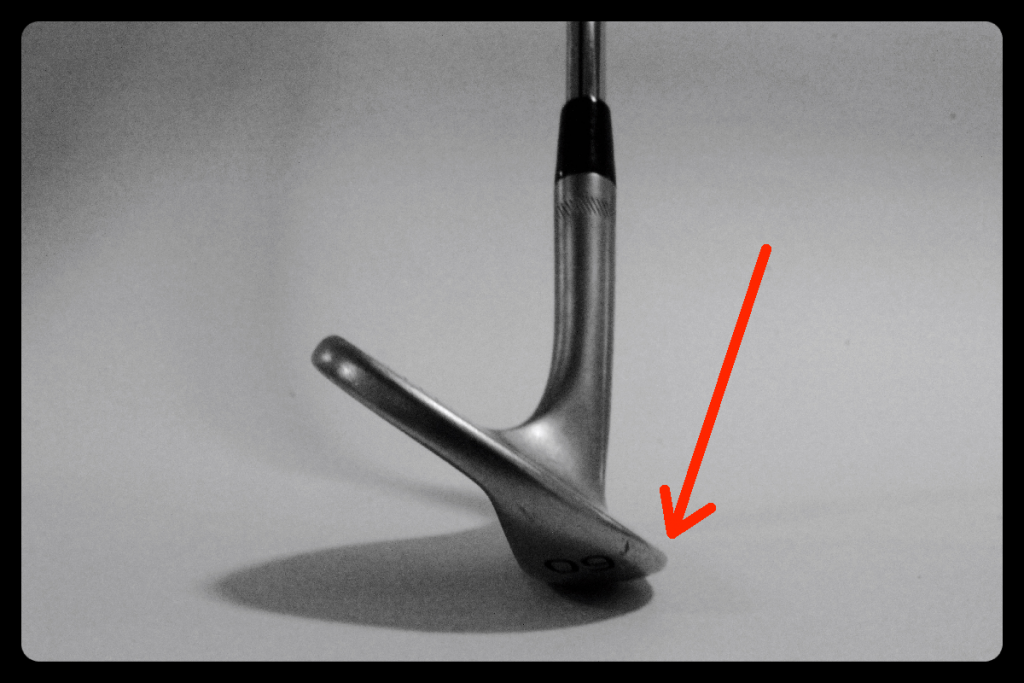
The leading edge of a wedge is the front and bottom edge of the clubface. This edge is very sharp on a wedge compared to longer irons and clubs. If the leading edge comes into contact with the ground to early, it increases the chance for the wedge to burrow into the ground, which will result in a shot that is way too short.
8. Sole
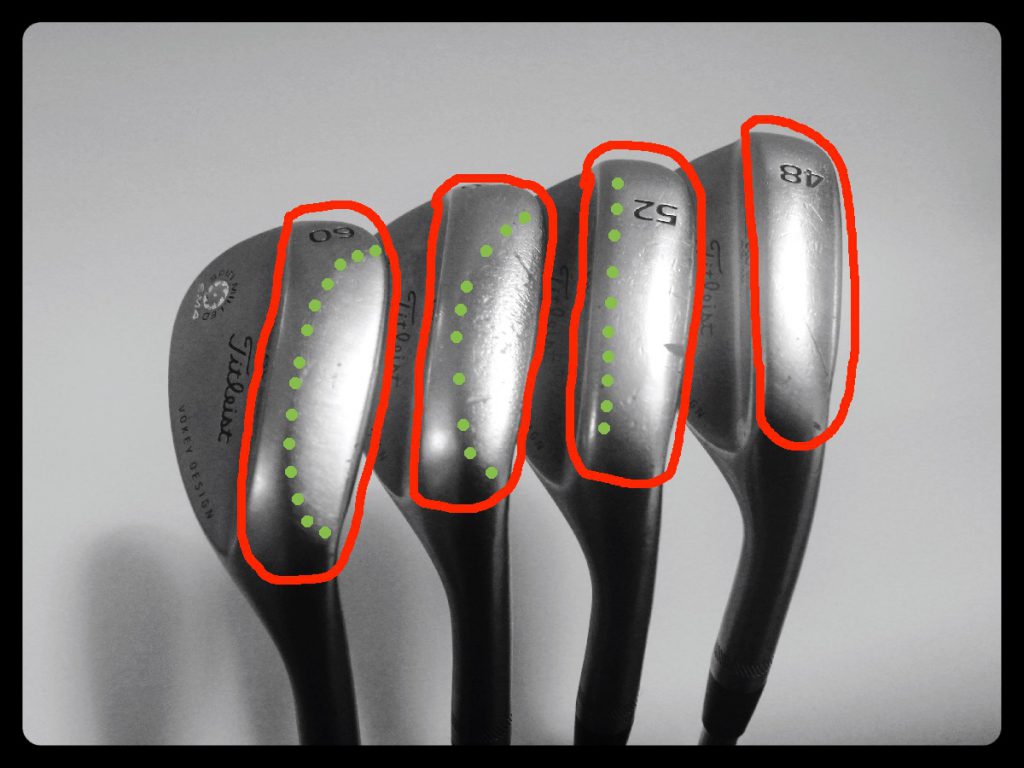
The sole of a wedge is the lower portion of the club head, located underneath the club head. This part of the club is essential in order to prevent the club from digging into the ground when the two meet. Imagine a wedge with a super narrow sole, it will have far greater tendency to burrow into the ground and get stuck than with a wider sole.
9. Grind
Grind is how the sole on the wedge is designed. It can be formed in different ways, it may be wide or narrow etc. On Titleist’s SM6 wedges there are L, S, K, M and F grind, each of which fits a different type of player, and also fits various types of course conditions.
10. Grooves
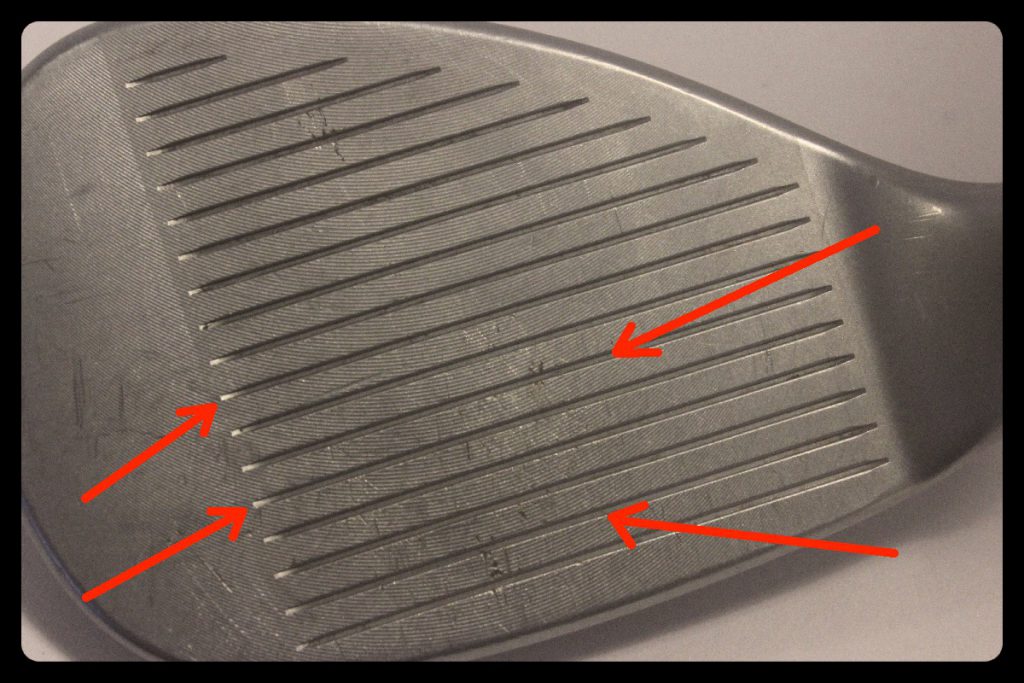
The grooves on a golf club are located on the clubface, and are designed to create more backspin on the ball. Your sand-wedges grooves will typically be worn out earlier the the other wedges in your bag, because the sand in the bunkers is very hard on the grooves. Fresh groove is ABSOLUTELY ESSENTIAL in order to produce a decent amount of backspin.
11. Milling
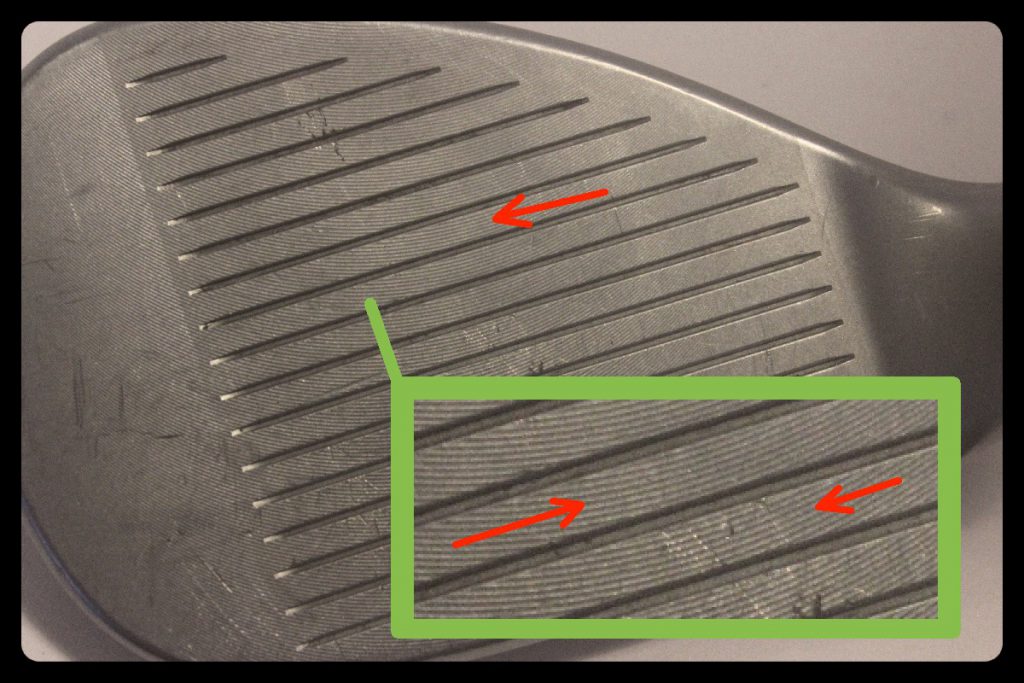
The milling on a wedge is the “mini grooves” across the clubface. These mini grooves are usually only seen on wedges. They are often designed in a curved shape, and can be difficult to see unless you look carefully.
Hopefully you have a little better understanding of what a golf wedge is made of now!
Now you just need to learn how to use it properly. Check out 9 Best Chipping Tips for Instant Better Performance Around the Green


