- +4527976587
- mail@worldofshortgame.com

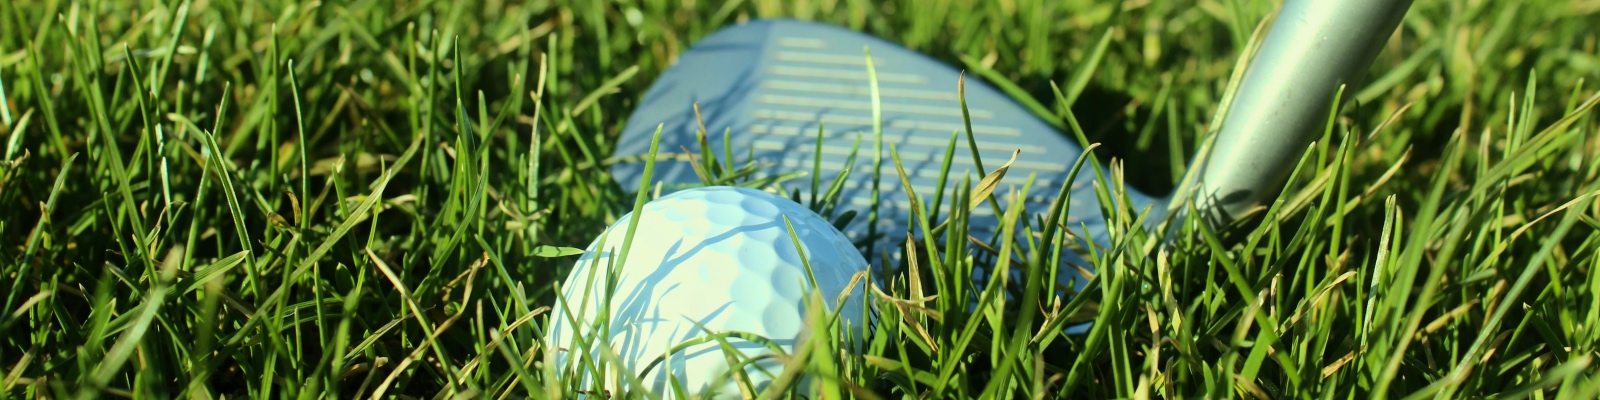
Chipping

How to Hit A Lob Shot in Golf
How to Hit A Lob Shot in Golf
The lob shot in golf — a high, soft chip shot that lands gently and stops quickly. If you’ve ever watched professionals like Phil Mickelson, you’ve likely seen this impressive shot executed perfectly. While it may seem like an advanced skill, with the right technique and practice, you too can learn how to execute it effectively.
Why Should You Use the Lob Shot in Golf?
The lob shot is particularly useful in situations where you have little green to work with. This occurs when there is a bunker, rough, or slope between you and the hole, and you need the ball to land softly and stop quickly. The high trajectory makes this shot effective when you don’t have the luxury of letting the ball roll a long distance after landing.
It’s not just a flashy shot — in certain conditions, it’s essential for controlling distance and height. The lob shot can also be a great way to refine your short game skills because the same technique can be applied in bunker shots, allowing you to become proficient in various scenarios. Read more about the bunker-technique here: 15 Most Important Bunker Shot Basics You Must Know
The Setup: Foundation of a Great Lob Shot
- Use the Highest Lofted Club: Start by choosing the wedge with the most loft. Ideally, this will be a 60-degree lob wedge, but a sand wedge can also work if necessary. Make sure it’s a wedge designed for short-game precision, not a club that mimics the shape of an iron.
- Open the Clubface: Rotate the clubface open significantly to increase the loft. Think about it this way: if you could balance a glass of wine on the clubface, you’re probably in the right position. The more you open the clubface, the higher the ball will fly.
- Lower Your Hands: After opening the face, the club will naturally point more to the right. To counteract this, lower your hands to adjust the club’s direction. You’ll do this by standing a little further from the ball, widening your stance, and bending your knees more than usual. This lowers the hands and aligns the clubface to point straight ahead despite its open position.
- Ball Position: Move the ball slightly forward in your stance. This will help you sweep the ball upward, producing the high trajectory you’re aiming for.
Executing the Lob Shot in Golf
- Make a Full Swing: Don’t be afraid to take a larger swing than you might for a standard chip shot. You’ll need to engage your wrists more, allowing them to hinge on the backswing and release on the downswing. This wrist action is essential for generating height.
- Follow Through: As you release the club, ensure your body is turning through the shot. This prevents the arms from overextending or collapsing, ensuring the clubface remains open and the loft is maintained throughout the swing.
- Swing with Confidence: One of the most common mistakes golfers make when attempting a lob shot is not committing to the swing. Because the shot is primarily about height rather than distance, you need to swing with the appropriate speed to launch the ball high. Trust the open clubface to take care of the height — don’t try to scoop the ball.
- Hit Under the Ball: Despite wanting the ball to go high, your main goal is to hit down on the ball and let the loft of the club do the work. If you try to lift the ball manually, you’ll likely top it, sending it way too far or thinning the shot.
Situations Where the Lob Shot Shines
- Close to the Green with a Short Pin: If you’re only 10–20 yards from the green but need to land the ball softly without much roll, the lob shot is your go-to solution.
- Over a Bunker or Obstacle: When facing a bunker or a patch of thick rough between you and the hole, the lob shot allows you to safely carry over the obstacle and land softly on the other side.
- Tight Lies or Uphill Lies: An uphill lie can make it easier to get the ball up in the air. On these types of lies, the lob shot becomes a natural solution for sticking the ball close to the hole.
Common Mistakes to Avoid
- Using the Lob Shot Too Frequently: While the lob shot is impressive and useful, it’s not always the best choice. It’s a high-risk shot, especially for amateur golfers, and should be used sparingly — only when necessary.
- Trying It from a Bad Lie: The lob shot requires a good lie for successful execution. Avoid attempting this shot from hard surfaces or when the ball is buried in deep rough.
- Not Committing to the Swing: Fear of over-hitting the ball leads to under-swinging. You need to swing confidently, trusting that the loft will do the job of getting the ball high.
Practice Makes Perfect
Because the lob shot is a high-risk shot, it’s important to practice it extensively before bringing it into play on the course. Start on the range or practice area from uphill lies or semi-rough, as this will make it easier to get the club under the ball. As your confidence grows, challenge yourself with flatter or even downhill lies. Read this article for more important tips on how to practice: 4 Reasons Why Your Short Game Doesn’t Improve, and How To Fix It
When to Use the Lob Shot in Golf
The lob shot can be a powerful addition to your short game, but it’s important to understand when to use it. Opt for this shot when you need to carry an obstacle or when you have very little green to work with. Avoid it in low-risk situations where a standard chip will suffice.
Once you master the technique, the lob shot becomes a great tool in your arsenal, adding versatility to your short game and giving you a creative solution for tricky situations. Remember, like any advanced shot, practice is key to building confidence and consistency.
Read more about when to select this shot, in the article How to Choose the Right Chip Shot in Golf: A Step-by-Step Guide
Remember, If you are new to the game of golf, you should checkout the beginners-universe called Golf For Beginners Academy. They provide the best content for beginner golfers!
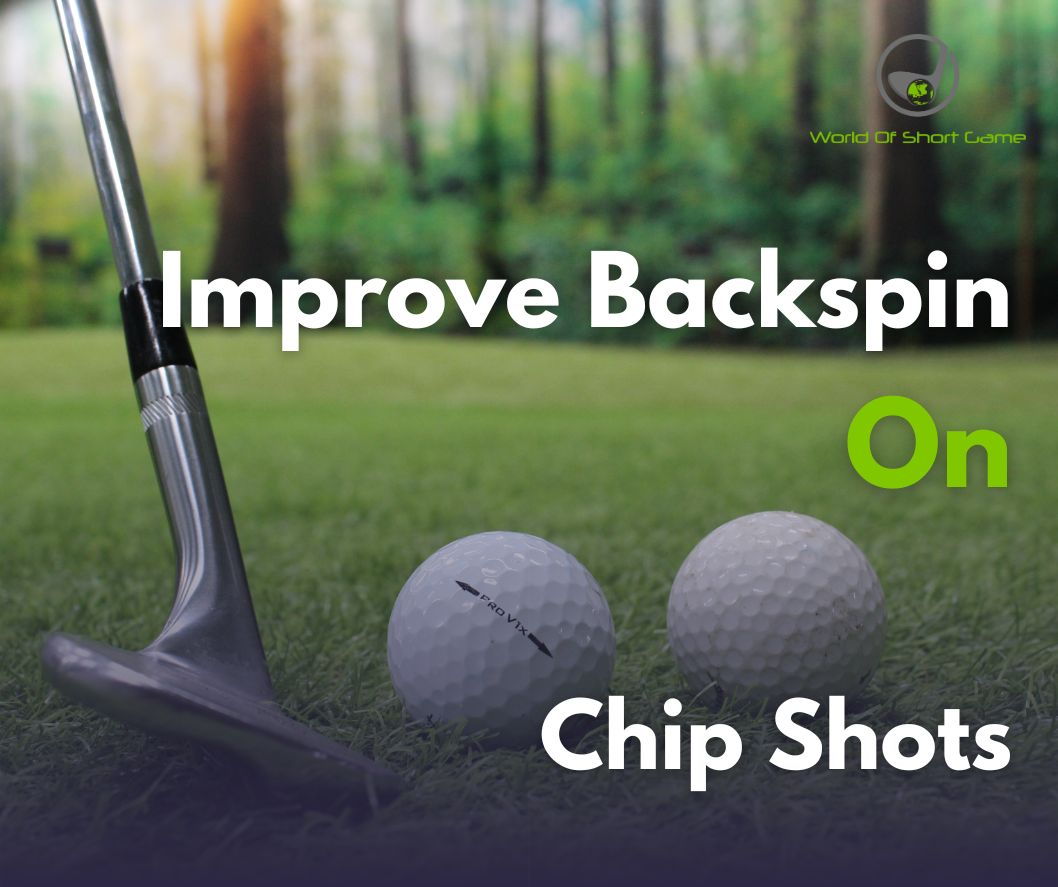
Improve Backspin on Chip Shots
Improve Backspin on Chip Shots: Mastering Short Game Control
Welcome to this section where we’re diving into the mechanics of Improve Backspin on Chip Shots—what it is, how it’s created, and what you can do to generate more of it in your chip shots. Mastering backspin isn’t just about creating the dramatic “ball spinning back” on the green that you see in pro tournaments. It’s about understanding the core mechanics that lead to better control, especially when it comes to spin rates (measured in RPMs). In this guide, we’ll also touch on how you can influence the ball’s behavior after it lands, making it check up or spin backward.
What Is Backspin?
In golf, backspin refers to the number of revolutions per minute (RPM) that the ball makes while in flight. More backspin helps control the ball’s flight, affecting both trajectory and the way it behaves upon landing. If you want the ball to check up or spin backward after hitting the green, mastering backspin is essential.
While you may associate backspin with the dramatic backward movement of the ball upon landing, it’s more often about controlling how much the ball will roll after touching down. For most amateur players, understanding how backspin is created will lead to more consistent, controlled chips that get closer to the pin.
Three Key Factors That Affect Backspin
There are three primary factors that determine how much backspin you can generate on your chip shots:
1-Club Head Speed
The clubhead speed at impact plays a significant role in how much backspin is generated. The faster the club moves through impact, the more potential there is for the ball to spin. However, it’s not just about swinging harder—technique is equally important. Achieving the right combination of speed and control is key to getting the ball to spin effectively.
2-Spin Loft
Spin loft refers to the angle difference between your attack angle and dynamic loft at impact. Let’s break down these terms:
- Attack angle: The path the clubhead takes into the ball—whether it’s moving upward or downward at impact. For chipping, you typically want a downward (negative) attack angle to make clean contact before the ground.
- Dynamic loft: The actual loft on the clubface at the moment of impact. It’s influenced by your setup, particularly shaft lean and clubface position.
The spin loft is essentially the angle between these two elements. A higher spin loft (within limits) leads to more backspin, but if the spin loft becomes too extreme (such as by opening the face too much), you may lose friction, and the ball will slide off the face with less spin.
3-Friction
Friction is critical for generating backspin. For backspin to occur, the club’s grooves need to grip the ball effectively, creating friction at the moment of contact. Clean, sharp grooves on the wedge are essential, and the ball’s surface should be free from debris. Any moisture, dirt, or grass between the club and the ball reduces friction, leading to less spin.
This is similar to how a rubber ping pong paddle creates more spin than a hard, smooth paddle. In the same way, clean grooves and a dry ball allow you to maximize the friction necessary for backspin.
Understanding Spin Loft and Friction Balance
Now that we understand the key factors, let’s dive deeper into the relationship between spin loft and friction. The goal is to maximize spin loft without losing friction, which is tricky and requires a balance.
For example, if you open the clubface too much, it increases the spin loft, but it reduces the amount of friction, making it difficult for the grooves to “grip” the ball. This results in a shot where the ball doesn’t spin as much, and the control diminishes.
The key is to find the right amount of loft and clubface angle that allows you to maintain friction while still generating a high spin loft. This balance varies depending on the shot you are trying to execute, the lie, and environmental conditions.
Practical Tips to Improve Backspin on Chip Shots
Here are some actionable tips to help you improve your backspin on chip shots:
1-Use Lofted Wedges
Using a higher-lofted wedge (such as a 60-degree or 56-degree) makes it easier to generate spin due to the added loft and sharper grooves. Lower-lofted clubs like 9-irons are less effective for producing spin, as the dynamic loft is significantly reduced.
2-Keep Your Grooves Clean
Clean your clubface and grooves regularly. Any dirt, grass, or moisture on the clubface will reduce friction, making it harder to generate backspin. Carry a towel and a groove cleaner during your round to keep your equipment in optimal condition.
3-Ball Position and Shaft Lean
When setting up, avoid placing the ball too far back in your stance, as this can decrease the loft at impact and reduce the spin potential. Instead, play the ball closer to the middle of your stance with a slight forward shaft lean. This setup allows you to maintain loft while ensuring a descending blow to the ball, promoting spin.
4-Ensure Solid Contact
To create maximum friction, ensure clean and solid contact with the ball. The clubface needs to strike the ball first, followed by the turf. This downward strike is key to getting the grooves to grab the ball, increasing spin. If you struggle with solid contact in your chipping checkout our readers favorit article called: 9 Best Chipping Tips
5-Increase Clubhead Speed (Without Sacrificing Control)
While more clubhead speed equals more spin potential, you need to ensure that the added speed doesn’t sacrifice control. Work on accelerating through the ball in a smooth, controlled manner.
How to Practice Backspin
1. Landing Spot Focus Drill
Pick a landing spot on the green and practice hitting chip shots that land in the same area but stop at different distances. This drill helps you understand how backspin affects roll-out after landing, giving you better control over your shots.
2. Spinny Chips Drill
Practice hitting chip shots with a soft golf ball (ideally one with a urethane cover for maximum spin). Focus on creating a downward strike while maintaining clubhead speed. Monitor how much spin you generate and adjust accordingly.
3. Towel Drill
Place a towel a few inches behind the ball and practice making clean contact without hitting the towel. This drill encourages a steeper angle of attack, promoting better contact and spin.
Conclusion: How to Improve Backspin on Chip Shots
Improving backspin on chip shots requires a combination of technique, equipment, and practice. By understanding the balance between spin loft and friction, and making the necessary adjustments in your setup and swing, you can achieve more spin, better control, and greater accuracy.
Remember, maximizing backspin isn’t about swinging harder—it’s about making solid contact with clean grooves, maintaining the right amount of dynamic loft, and hitting the ball with a controlled but aggressive swing. Practice consistently, and you’ll see improvements in how your chip shots check up and spin on the green.
Remember, If you are new to the game of golf, you should checkout the beginners-universe called Golf For Beginners Academy. They provide the best content for beginner golfers!

How to Choose the Right Chip Shot in Golf
How to Choose the Right Chip Shot in Golf: A Step-by-Step Guide
Chipping around the greens is one of the most important skills in golf. Selecting the right shot can make the difference between a good up-and-down and leaving yourself with a long putt. This article will provide a comprehensive breakdown of how to choose the right chip shot in golf, covering everything from evaluating the lie to picking your landing spot and matching the shot’s height to the conditions. By mastering this process, you’ll improve your consistency and lower your scores.
Step 1: Evaluate the Lie
The first step in selecting the right chip shot is to evaluate the lie. Understanding the lie allows you to determine your options and adjust your shot accordingly. Here are the key factors to consider:
A. Is the Clubhead’s Path Clear?
The first thing to determine is whether your clubhead has a clear path to the ball. Ask yourself if there are any obstacles, such as thick grass, rough, dirt, or rocks that could interfere with your swing.
- Free Path: If the club has a clear path, you can stick to a standard chip shot without adjusting too much.
- Obstructed Path: If there are obstacles, you may need to modify your swing by steepening the attack angle or increasing clubhead speed to power through any grass or rough.
B. How Much Grass Is Between the Ball and the Clubface?
Next, evaluate how much grass will be trapped between the ball and the clubface. The more grass, the more it will impact the ball’s speed, height, and spin.
- More Grass: The ball will come off with less speed, less spin, and will typically fly higher. You’ll need to add more speed to compensate.
- Less Grass: The ball will respond more predictably, and you can execute the shot with your normal speed and mechanics.
C. Where Is the Ball Relative to the Ground?
Finally, check how the ball is positioned in the grass. Is it sitting high or low in the rough, or nestled down close to the ground?
- High in the Grass: Be cautious with opening the clubface too much, as it might slide underneath the ball. You may need to grip slightly lower on the club to ensure good contact.
- Low in the Grass: If the ball is sitting deep in the grass, avoid using too much loft or opening the clubface, as this can lead to a bladed shot.
Adjust Your Shot Based on the Lie
Once you’ve evaluated the lie, you’ll have a better sense of what shots are possible. For example, if the lie is clean, you might have the option to play a higher trajectory shot. However, a poor lie may limit your choices to a lower, running chip.
Step 2: Pick the Best Landing Spot
Once you’ve evaluated the lie, the next step is to choose the right landing spot. This will dictate where you want the ball to hit the green before it rolls out toward the hole. Your landing spot is crucial for controlling distance and ensuring that the ball ends up near the target.
A. Visualizing the Shot
A key part of picking the right landing spot is visualizing the entire shot. Imagine how the ball will behave once it hits the green—how much it will roll and in what direction. Consider the slope and speed of the green to get a better sense of where you want the ball to land.
- Short Chips: If you’re closer to the hole, you’ll want the ball to land softly and not roll too far. Choose a landing spot nearer to the hole, and use a higher lofted club to control the rollout.
- Longer Chips: For longer chips, the ball will need to travel further in the air and roll more. Pick a landing spot that allows for sufficient roll and take into account the slope and green speed.
B. Match the Lie with the Landing Spot
The landing spot you choose should also reflect the lie you’re dealing with. For example, if the ball is sitting up in the rough and you plan to hit a high shot, you may need a closer landing spot. If the lie is tight, you might need to pick a spot further away to let the ball roll more.
C. Factors Affecting the Landing Spot
When picking your landing spot, consider these factors:
- Green Speed: Faster greens will require a landing spot closer to you, while slower greens may allow for a spot farther away.
- Slope of the Green: Landing on an uphill or downhill slope will affect how much the ball rolls out.
- Wind Conditions: Wind can influence how the ball behaves once it lands on the green, so keep that in mind as well.
For more details on the topic of Landingspot, you should read the article “How to Choose the Right Landing Spot When Chipping”
Step 3: Match the Height of the Shot to the Landing Spot
After evaluating the lie and choosing your landing spot, the final step is to match the height and trajectory of your shot to the landing spot. The height of the shot will determine how much the ball rolls out after landing, so this step is crucial for getting the ball close to the hole.
A. Higher Shots for Softer Landings
If you need the ball to stop quickly, opt for a higher trajectory. Higher shots land softly and roll less, making them ideal for tight pins or when there’s little room to work with.
- How to Hit High Shots: Open the clubface slightly and set the ball farther forward in your stance. Use a wedge with more loft, such as a sand or lob wedge.
B. Lower Shots for More Roll
Lower shots tend to roll more after they land. This is useful when you need the ball to travel a longer distance after hitting the green, or when the pin is located further away.
- How to Hit Low Shots: Use a less-lofted club, like a pitching wedge or 9-iron. Set the ball slightly farther back in your stance and keep the clubface more square to reduce loft.
C. Adjust Based on Conditions
There are several conditions that can affect how the ball reacts after landing:
- Green Hardness: On firm greens, expect the ball to roll out more, even on higher shots. On softer greens, the ball will stop more quickly.
- Wind: Wind can either hold the ball up or push it down, affecting the ball’s flight and how it rolls after landing.
- Slope: Pay close attention to the slope of the green. A downhill slope will cause the ball to roll out much farther than an uphill slope.
If you want to learn more about hitting the ball higher, read the article How to Hit High Chip Shots, and for lower shots you should read 4 Chipping Tips for Lower Trajectory Shots.
Practice Tips for How to choose the right chip shot in golf
The ability to consistently choose the right chip shot comes with practice and experience. Here are a few tips to help you refine your shot selection process:
A. Practice Landing Spot Drills
Set up landing zones on the practice green and focus on hitting shots that land in those areas. By practicing this, you’ll get a better sense of how different shots behave based on trajectory and roll.
B. Experiment with Different Lies
Practice chipping from various lies, such as deep rough, tight fairways, and uphill or downhill slopes. By practicing from different conditions, you’ll gain confidence in evaluating lies and adjusting your shot accordingly.
C. Work on Visualization
Develop your visualization skills by watching how the ball flies and rolls during practice. The better you can visualize the shot, the more accurate your shot selection will be during actual play.
Conclusion on How to choose the right chip shot in golf
Choosing the right chip shot is a skill that requires a combination of lie evaluation, precise landing spot selection, and trajectory control. By mastering these three steps, you’ll significantly improve your short game, lower your scores, and increase your consistency around the green.
Next time you’re faced with a tricky chip, remember to:
- Evaluate the lie and determine your options.
- Pick the best landing spot, considering green speed, slope, and wind.
- Match the shot’s height to the landing spot, adjusting for conditions.
With practice, you’ll be able to make smarter decisions and execute your chip shots with confidence.
Remember, If you are new to the game of golf, you should checkout the beginners-universe called Golf For Beginners Academy. They provide the best content for beginner golfers!
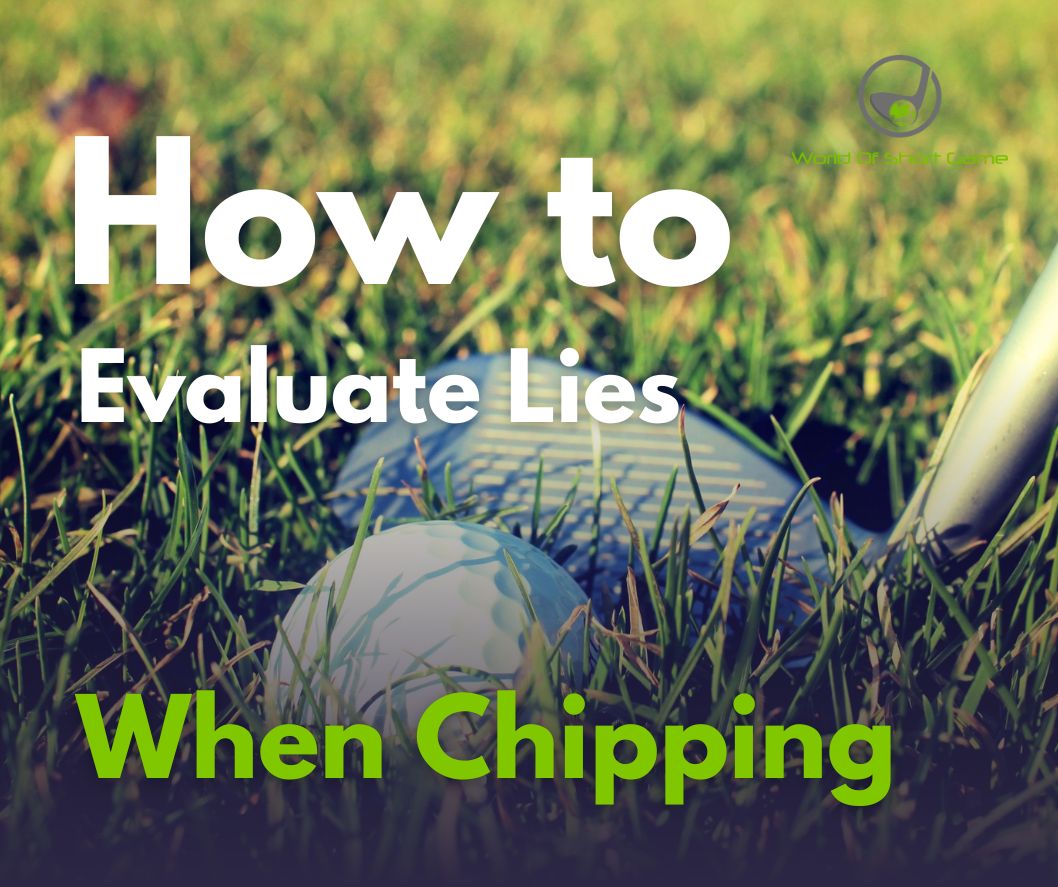
How to Evaluate Lies When Chipping
How to Evaluate Lies When Chipping: Key Questions and Adjustments
Evaluating the lie when chipping is one of the most important yet overlooked aspects of the short game. The way the ball sits in the grass drastically affects shot selection, trajectory, and distance. In this guide, we’ll explore how to evaluate lies when chipping and how to make necessary adjustments to your swing and club selection based on the conditions.
The Importance of Lie Evaluation
When chipping, many players focus only on technique and club selection without considering how the ball’s position in the grass affects the shot. The lie determines how cleanly the club can make contact with the ball, how much grass will get trapped between the club and ball, and how much speed and spin you can generate.
The first step to mastering your short game is learning how to properly evaluate the lie. This will allow you to make informed decisions about your shot and increase your consistency.
Three Key Questions to Ask to answer: How to evaluate lies when chipping
When you approach the ball, there are three critical questions you should ask yourself to properly assess the lie.
A. Does the Club Have a Free Path to the Ball?
The first and most important question to ask is whether your club has a clear path to the ball, or if there are obstacles like grass, dirt, rocks, or other debris in the way.
- If Yes (Free Path): If the club has a free path, you can approach the shot as normal, using your standard swing mechanics without much adjustment.
- If No (Obstructions): If there is grass or other obstacles in the club’s path, you will need to make some changes. There are two primary adjustments to consider:
- Increase Clubhead Speed: Swing faster to generate more power and ensure the club can get through the grass.
- Steepen the Attack Angle: To ensure the club doesn’t get caught in the grass, place the ball further back in your stance to create a steeper, more downward angle of attack. You can also try adjusting the swing path to avoid any obstacles, such as swinging from a different angle.
B. How Much Grass Will Be Trapped Between the Ball and the Club?
The second question you need to ask is whether any grass will be trapped between the ball and the clubface during impact. The amount of grass affects how much spin, speed, and height the shot will have.
- More Grass in the Way: If you expect a lot of grass to be trapped between the club and the ball, the shot will come off with less speed, higher trajectory, and less spin. To adjust for this, increase the clubhead speed to account for the slower ball speed.
- Minimal Grass: If there’s little to no grass between the ball and the club, the ball will come off with more spin and a lower trajectory. In this case, you can swing with your normal mechanics without much adjustment.
C. How is the Ball Positioned Relative to the Ground?
The final question is about the ball’s placement in the grass. Is it sitting high or low relative to the ground? This can drastically impact how you approach the shot.
- Ball Positioned High in the Grass: When the ball is perched high in the grass, you don’t want to swing too steeply. Be careful not to open the clubface too much, as you risk sliding under the ball without making proper contact. A simple fix is to grip down on the club slightly, which will help adjust the height of your swing to match the ball’s position.
- Ball Positioned Low (Buried): If the ball is deep in the grass or very close to the ground, be mindful of the leading edge of the club. Avoid opening the clubface too much, as this will cause you to blade the shot. In this case, you may need to add more shaft lean, placing your hands ahead of the ball to keep the leading edge down and make solid contact.
Advanced Lie Evaluation for More Skilled Players
For advanced players, lie evaluation becomes more detailed. Beyond speed and trajectory, you may also want to evaluate the amount of spin you can generate and the shot’s expected roll after it lands.
- Evaluating Spin: The more grass between the ball and the club, the less spin you will generate. Conversely, clean contact allows for more spin. This is crucial when planning how the ball will behave once it lands on the green.
- Evaluating Ball Flight: High or low? Based on the lie, you’ll need to consider how the ball will fly and how much it will roll after landing. Adjusting clubface angle and swing speed can help modify the ball’s flight and roll.
Putting it All Together
Lie evaluation doesn’t have to be complicated. Skilled players often evaluate the lie within seconds, quickly processing how the ball sits and making the necessary adjustments. For beginners, start by asking simple questions like “Is there grass in front of the ball?” and “Is the ball sitting up or down in the grass?” Once you’ve practiced enough, evaluating the lie will become a natural part of your pre-shot routine.
For more related information about lie and shot selection process, check out this article How to Choose the Right Landing Spot When Chipping
Conclusion on How to evaluate lies when chipping
Properly evaluating the lie when chipping can drastically improve your short game performance. By asking yourself these three key questions and making appropriate adjustments to your swing and club selection, you’ll be able to handle a wider variety of lies and improve your consistency around the greens.
Lie evaluation is about controlling the outcome and making sure you have the right approach for the shot. With practice, you can take control and avoid leaving your results to luck!
Remember, If you are new to the game of golf, you should checkout the beginners-universe called Golf For Beginners Academy. They provide the best content for beginner golfers!
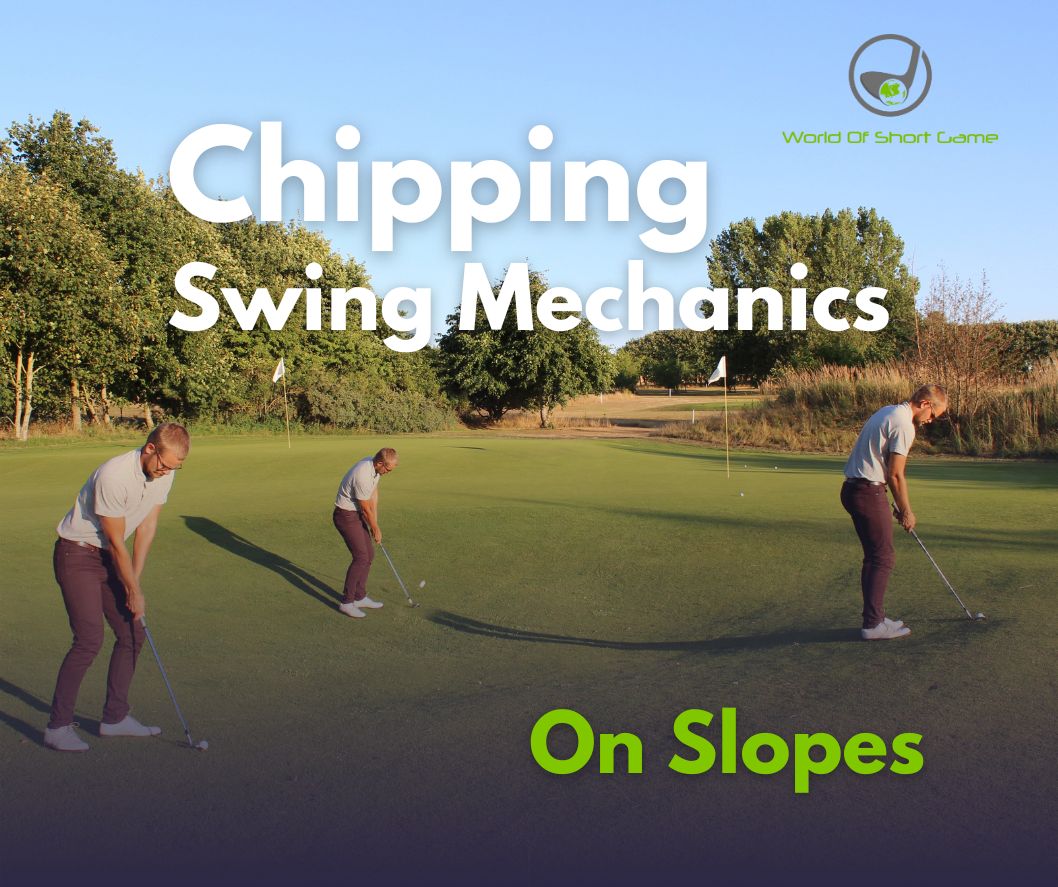
Chipping Swing Mechanics on Slopes
Chipping Swing Mechanics on Slopes: A Comprehensive Guide
When chipping from sloped lies, understanding the geometry of the swing and how to adjust to different slopes is essential for maintaining control and precision. Whether the ball is above or below your feet, your swing mechanics must adapt to the unique angles and heights created by the terrain. In this guide, we’ll dive into the fundamentals of chipping swing mechanics on slopes, focusing on how to adjust your setup, swing radius, and shoulder positioning to achieve better contact and consistency.
Understanding the Geometry of the Swing on Slopes
The geometry of the swing changes drastically on sloped lies. Unlike flat lies, the distance from the ball to your club is altered, and this requires changes in both your swing radius and the center of your swing, which is typically aligned with your left shoulder.
Chipping with the Ball Below Your Feet
When the ball is below your feet, it becomes more challenging to make solid contact because your club naturally sits higher than the ball. To adjust:
A. Moving the Swing Center (Left Shoulder) Closer to the Ground
To ensure the clubhead reaches the ball, you need to lower the center of your swing. The key adjustment here is to increase the forward bend at your hips, moving your left shoulder closer to the ground.
- Why It Works: By bending forward more, you bring the swing plane lower, allowing the club to contact the ball correctly despite the slope. This change helps to level the distance between the ball and the clubhead.
- Hip Angle Change: In situations where the ball is below your feet, your hips should be at a steeper angle than in flat lies. This forward tilt compensates for the ball’s lower position.
B. Maintain Balance and Stability
A common challenge with this setup is maintaining balance. As you bend more, you may feel off-balance. To counteract this:
- Widen your stance for stability.
- Keep your weight centered, focusing on a smooth, controlled swing.
Chipping with the Ball Above Your Feet
When the ball is above your feet, the situation is reversed. The ball is closer to your body, making it necessary to adjust your stance and swing radius to avoid hitting fat or pulling the shot left.
A. Standing Taller and Reducing Forward Bend
To adapt, stand taller with less forward bend in your hips. This raises your left shoulder, moving the center of the swing higher to match the ball’s elevation.
- Hip Angle Change: When the ball is above your feet, your hips will be less bent compared to a flat lie or when the ball is below your feet. This helps ensure your swing remains on-plane with the ball’s height.
B. Shortening the Swing Radius by Gripping Down
Another crucial adjustment when the ball is above your feet is to shorten the swing radius. You can do this by gripping further down on the club, effectively shortening the distance from your left shoulder to the clubhead.
- Why It Works: Shortening the club by gripping down helps to match the shorter distance between the ball and your body. Without this adjustment, you risk hitting the ball too early or too steeply.
C. Adjusting for Directional Changes
When chipping with the ball above your feet, your hands naturally sit higher, which can cause the clubface to point more to the left. To compensate:
- Aim slightly right to counteract the leftward bias.
- Open the clubface slightly if necessary, depending on the desired shot trajectory.
Combining Swing Mechanics for Effective Adjustments
Understanding how to combine the changes in your swing radius and the center of your swing can help you chip more consistently from any slope.
- On a Downslope (Ball Below Feet): Increase forward bend, grip further up on the club, and focus on staying balanced throughout the swing.
- On an Upslope (Ball Above Feet): Stand taller, grip down on the club, and aim slightly right to counteract the natural leftward bias of the clubface.
Mastering the Art of Consistency on Slopes
The key to successful chipping on slopes is practicing these adjustments until they become second nature. It’s important to experiment with different slopes and lies during practice sessions, so you can develop a feel for how much to adjust based on the severity of the slope.
- Practice Tip: Spend time practicing on uneven surfaces to get comfortable with changing your setup, balance, and swing mechanics. Focus on keeping your left shoulder and body aligned with the slope to maintain proper contact.
Conclusion: The Importance of Adapting to Slopes
In summary, mastering chipping swing mechanics on slopes is all about adjusting to the geometry of the terrain. By understanding how to move the center of your swing, modify your stance, and adjust the swing radius, you can effectively handle both uphill and downhill lies. Whether the ball is above or below your feet, applying these principles will lead to cleaner, more consistent chip shots.

How to Chip with the Ball Below Your Feet
How to Chip with the Ball Below Your Feet: Key Adjustments and Techniques
Chipping with the ball below your feet is one of the most challenging shots in golf due to the geometry of the swing being thrown off. If you don’t make proper adjustments, your club will likely be too high to make solid contact with the ball, resulting in inconsistent or poor shots. In this article, we’ll cover how to chip with the ball below your feet, providing adjustments to your setup, swing radius, and technique to help you maintain control and accuracy.
Understanding the Challenge: Geometry Doesn’t Add Up
When the ball is below your feet, the distance between the ball and your club increases compared to a normal, flat lie. This shift alters the geometry of your swing, making it difficult to strike the ball cleanly. Without adjustments, your clubface will be too high above the ball, which can lead to thin shots or poor contact. To compensate, you’ll need to change both the radius of your swing and your body positioning.
Adjusting the Swing Radius
The first key adjustment is changing the radius of your swing, which refers to the distance from your hands to the clubhead. On a flat surface, this distance remains constant, but when the ball is below your feet, you need to shorten the swing radius to reach the ball.
A. Grip Further Up on the Club
The simplest way to adjust the swing radius is to grip further up on the club. By gripping the club as high as possible, you shorten the effective length of the club, helping you bring the clubface down to the level of the ball.
- How Much to Grip Up: The amount you grip up on the club will depend on how far below your feet the ball is. If the slope is steep, grip further up the club to compensate.
B. When This Isn’t Enough
In some situations, gripping up on the club alone might not be enough to adjust your swing. If the slope is steep, you may need to combine this adjustment with changes to your body positioning.
Adjusting Your Body Position: Changing the Centrum of Your Swing
In addition to gripping up on the club, you’ll need to make adjustments to your upper body positioning. This ensures that your club can properly contact the ball without lifting off the ground or digging into the slope.
A. Bend at the Hips and Knees
To bring your upper body closer to the ball, you need to bend more at your hips and slightly at your knees. This helps bring the entire swing plane down to the ball’s level.
- Why You Need Both: Bending only at the knees will limit your ability to swing freely, while bending only at the hips will put too much pressure on your back. A combination of the two helps maintain balance and swing efficiency.
B. Keep a Balanced Stance
When bending, it’s important to remain balanced. You’ll be slightly farther away from the ball due to your forward bend, so make sure your stance is wide enough to provide stability throughout the swing.
Maintain Consistent Height Throughout the Swing
One of the biggest challenges when chipping with the ball below your feet is maintaining a consistent heightthroughout your swing. Many players tend to rise up or lower their body during the swing, which throws off the contact point and leads to inconsistent results.
- Stay Level: Once you’ve set your stance by bending at the hips and knees, focus on keeping your upper body at that same height during the entire motion. Any vertical movement will disrupt the accuracy of your strike.
Clubface Direction Adjustments
When your hands are lower at address, the clubface direction can be affected. On this kind of lie, the clubface tends to point more to the right because of the raised angle.
A. Compensating for the Rightward Bias
You can make a few adjustments to compensate for this rightward aim:
- Open the Clubface Slightly: You can open the clubface to ensure it points toward your target. However, opening the clubface can also add loft, so use this carefully depending on the type of shot you want to hit.
- Adjust Your Aim: Another option is to aim slightly left. Since the clubface will point right on this type of lie, aiming left compensates for the natural rightward drift.
B. Maintain Proper Loft
Adjusting for the rightward aim doesn’t always mean you need to alter the loft drastically. If you follow the basic adjustments—gripping up, bending forward, and maintaining a steady height—you should still maintain the correct amount of loft for the shot you’re trying to execute.
Final Thoughts on Chipping with the Ball Below Your Feet
Chipping with the ball below your feet can be tricky, but by making these simple adjustments to your swing radius, body positioning, and clubface direction, you can ensure better contact and more accurate shots. Remember to:
- Grip up on the club to shorten the swing radius.
- Bend at your hips and knees to lower your body and align your swing with the ball.
- Stay level throughout the swing to maintain consistent contact.
- Adjust your aim or clubface direction to compensate for any rightward drift.
By practicing these techniques, you’ll become more confident in handling these challenging lies and improving your overall short game. Good luck, and happy chipping!

Chipping Tips for Ball Above Feet
Chipping Tips for Ball Above Feet: How to Adjust Your Technique
Chipping from uneven lies can be a challenging aspect of your short game, especially when the ball is above your feeton a slope. The slope changes the geometry of your swing, making it essential to adjust your stance, club selection, and swing mechanics to maintain accuracy and control. In this guide, we’ll break down chipping tips for ball above feet, focusing on adjustments in setup, swing radius, and clubface direction to help you hit cleaner, more controlled shots from difficult lies.
Understanding the Challenge
When the ball is above your feet, the natural geometry of your swing is altered. The club is now closer to the ball than it would be on a flat lie, and without adjustments, this can result in inconsistent contact—often leading to thin or pulled shots. Adjusting your swing radius and stance can help neutralize this effect and improve the quality of your contact.
Adjusting Swing Radius
One of the first adjustments you should make when the ball is above your feet is to change the swing radius. This means shortening the distance between your club and the ball to match the slope.
A. Grip Down on the Club
The simplest way to adjust your swing radius is by gripping down on the club. By choking down, you effectively shorten the club, bringing the radius of your swing in line with the elevated position of the ball. This is one of the easiest and most effective ways to adjust to this kind of lie.
- How Much to Grip Down: The amount you grip down should correspond to how far the ball is above your feet. If the slope is severe, grip further down the club to maintain control.
B. Stand Taller
Another option is to change the centrum of your swing by adjusting your posture. Instead of bending over as much as you normally would, stand taller in your stance. This makes your body “taller,” helping you to match the ball’s position relative to your swing path.
- Why This Works: By standing taller, the club naturally sits higher off the ground, which compensates for the elevated ball position.
C. Combine Both Techniques
In most situations, you can combine these two adjustments—gripping down slightly on the club while also standing taller. This combination provides the best balance of control and consistency, helping you maintain a good swing path and ensure solid contact.
Adjusting Clubface Direction
One of the most critical aspects of chipping when the ball is above your feet is managing the clubface direction. On this type of lie, your hands will naturally be lower at impact, which changes the orientation of the clubface.
A. Clubface Tends to Aim Left
When your hands are lower at address, the clubface tends to point more left of your intended target. This happens because the lie angles the clubface, closing it slightly.
- Compensate for the Left Bias: To counteract this leftward bias, you have two options:
- Open the Clubface: You can open the clubface slightly at setup. This adjustment will counteract the natural closing effect and help you hit the ball toward your target. Be aware, though, that opening the face can also add loft, which may cause the ball to fly higher.
- Aim Right: Another option is to aim slightly right of your target. As the clubface points left, aiming right compensates for this directional shift, helping you land the ball on your intended line.
B. Impact on Loft and Height
When you open the clubface to counteract the leftward bias, it can also result in a higher ball flight. If you need a lower shot, consider aiming right instead of adjusting the clubface, as opening the clubface could change the flight dynamics.
Applying the Technique in Different Situations
Depending on the severity of the slope and the specific shot you need to hit, you may want to adjust your technique further. Here are a few strategies for different scenarios:
A. Hitting to a Back Pin
If you’re aiming for a back pin and need to avoid a high shot:
- Grip down on the club.
- Stand taller in your stance to compensate for the lie.
- Aim slightly right to ensure the ball doesn’t veer left due to the slope.
B. Managing Height on the Shot
If you’re aiming to hit the ball higher, such as for a soft landing, you can combine adjustments:
- Open the clubface to add loft.
- Grip down slightly to maintain control while still getting the desired height.
- Adjust your stance to accommodate the slope and ensure a clean strike.
Conclusion
Chipping with the ball above your feet can be tricky, but with the right adjustments, you can maintain control and accuracy. By modifying your swing radius with a shorter grip or taller stance, and compensating for the clubface direction, you can effectively handle these challenging lies. Practice these techniques to find what works best for your game, and soon enough, you’ll be able to approach uphill chip shots with confidence.
Good luck out there, and may your next chip land perfectly on target!


How to Chip Uphill in Golf: Mastering the Slope
How to Chip Uphill in Golf: Mastering the Slope
When faced with an uphill lie in golf, chipping requires adjustments to your technique to control the ball’s flight and roll effectively. Uphill chips cause the ball to naturally fly higher, so understanding how to modify your stance, setup, and swing mechanics can help you handle these shots with confidence. In this guide, we’ll cover the key techniques for how to chip uphill in golf and explore two different approaches depending on the height you want to achieve.
Understanding the Uphill Lie: Adjust Your Expectations
One of the most important things to recognize with an uphill lie is that the ball will naturally come out higher than it would on a flat surface. This elevation affects the ball’s trajectory and roll, so it’s essential to factor this into your landing spot and shot selection. The slope will automatically add loft to your shot, which means you should plan for the ball to fly higher and potentially roll less after landing.
Key Tip: When selecting your landing spot, aim to adjust for the higher ball flight. Consider how much the ball will roll after it hits the green, and choose your spot accordingly.
Basic Setup for an Uphill Chip Shot
Let’s start with the most basic chipping setup for an uphill lie. The idea is to keep things as simple as possible while making a few minor adjustments for the slope.
A. Weight Distribution
The key difference in this setup compared to a flat lie is the weight distribution. Because of the slope, your weight will naturally shift more onto your front foot. This adjustment helps keep your balance and encourages a clean strike on the ball.
- Weight on Front Foot: Make sure most of your weight remains on your front foot throughout the shot. This positioning is essential for maintaining control and ensuring the clubhead moves through the shot without getting stuck in the slope.
B. Ball and Hand Positioning
Keep the ball and hand positions the same as you would on a flat lie. By maintaining the usual ball and hand setup, you ensure consistency in your contact with the ball.
C. Swinging Up the Slope
When chipping from an uphill lie, the biggest challenge is making sure the clubhead travels upward along the slope. A regular swing could cause the club to dig into the slope, which results in poor contact. To avoid this:
- Extend and Rise: Focus on rising and extending through the shot more than you would on flat ground. This movement will lift your lead shoulder and hands upward, ensuring the clubhead follows the slope and makes clean contact with the ball.
Tip: As you swing, visualize your hands and clubhead moving up along the slope. This technique helps prevent the club from digging into the grass, resulting in a smoother strike.
Technique for Higher Chip Shots on an Uphill Lie
Now, let’s say you want to hit an even higher chip shot from an uphill lie. This situation calls for a few adjustments in your stance and swing mechanics to elevate the ball further.
A. Adjust Your Body to the Slope
For a higher shot, you’ll need to adjust your body so that it follows the slope more closely. Here’s how:
- Wider Stance: Take a wider stance to maintain better balance, especially as your weight will now shift more towards your back foot.
- Tilt Backward: Tilt your upper body slightly backwards, aligning your shoulders with the slope. This positioning helps you swing up along the slope and generate a higher ball flight.
B. Ball Position
Move the ball slightly forward in your stance. By positioning the ball forward, you ensure that your swing path travels more upward along the slope, which is key for producing a higher trajectory.
C. Swing Mechanics
Once you’ve adjusted your stance and ball position, you can incorporate a few swing mechanics to further elevate the ball:
- Hands Closer to Your Body: Finish with your hands closer to your lead pocket to generate more height. This technique encourages less shaft lean, adding more loft to the clubface.
- End with a High Finish: Keep your finish high, and make sure your hands are close to your body at the end of the swing.
Tip: When using this technique, there’s a risk of the club digging too much into the slope. To prevent this, focus on finishing with your hands close to your body and keeping your swing smooth.
Practical Tips for Mastering Uphill Chip Shots
Regardless of whether you’re aiming for a basic or higher shot from an uphill lie, here are a few practical tips to keep in mind:
- Adjust for the Natural Loft: Remember, the slope will naturally add loft to your shot. Keep this in mind when picking your landing spot and adjusting for roll.
- Practice Both Techniques: Some situations will call for a higher shot, while others will require a basic chip. Practice both techniques to see which works best in various situations.
- Control Your Body Movement: The key to successful uphill chipping is controlling your body movement to match the slope. Focus on rising and extending during the swing to ensure clean contact.
Conclusion
Learning how to chip uphill in golf can be a game-changer for your short game. By understanding how to adjust your stance, weight distribution, and swing mechanics, you’ll be able to handle uphill lies with ease. Whether you opt for a basic setup or a higher chip shot, these techniques will help you control the trajectory and roll of your ball, leading to better results on the green. With regular practice, you’ll gain the confidence needed to execute these shots in various course conditions.
Good luck on your next round!

How to Hit High Chip Shots: Elevate Your Short Game
How to Hit High Chip Shots: Elevate Your Short Game
Learning how to hit high chip shots is crucial for navigating tricky situations on the golf course, such as when you need to clear an obstacle or stop the ball quickly on the green. In this guide, we’ll explore how to hit high chip shots using adjustments in setup and swing mechanics, so you can confidently loft the ball higher when needed.
The Importance of Face Angle in Setup
The easiest way to make the ball go higher is by adjusting the clubface angle at setup.
A. Opening the Clubface
To elevate your chip shots, start by opening up the clubface. However, it’s essential to open the face before gripping the club. This prevents you from unintentionally manipulating the club during the swing.
- Tip: Grip the club after opening the face to maintain the desired loft and prevent adjusting it during your swing.
B. Managing Direction
One issue that arises when you open the clubface is that it naturally points to the right (for right-handed golfers). This misalignment can cause the ball to travel off course unless addressed.
- Solution 1: Adjust your stance by aiming your body left of the target. This compensates for the open clubface by directing the shot more accurately toward the target.
- Solution 2: For more precision, widen your stance and make additional setup adjustments, which we will cover next.
Setup Adjustments for Higher Chip Shots
In addition to opening the clubface, small changes to your stance and hand position can help increase the height of your chip shots.
A. Widen Your Stance and Lower Your Hands
Widening your stance, especially by moving your back foot outward, allows you to place the ball slightly forward in your stance. By doing this, you naturally lower your hands, which helps direct the clubface upward.
- Tip: Lowering your hands counteracts the clubface pointing right, ensuring the clubface remains aimed straight ahead despite being open.
B. Ball Position
Placing the ball further up in your stance (towards your front foot) gives the shot a steeper launch, helping the ball fly higher.
Swing Mechanics for Higher Chip Shots
While setup is crucial, certain swing mechanics can also significantly affect the height of your chip shots.
A. Open the Clubface During the Backswing
One way to add height is by further opening the clubface during the backswing. The more you open the face, the higher the ball will fly.
- Caution: Be mindful of maintaining good contact. Opening the clubface too much can alter the bounce angle, making contact more challenging and increasing the risk of poor strikes.
B. Use Wrist Mechanics for a Higher Follow-Through
Another method for generating higher chip shots is by manipulating your lead wrist (the left wrist for right-handed players) in the follow-through.
- Flat Wrist: A flat wrist with hands far from the body creates forward shaft lean, which results in lower shots.
- Extended Wrist: Adding extension to the lead wrist (bending it back) allows the shaft to be more vertical, which increases loft and sends the ball higher.
- Tip: Focus on finishing your follow-through with your hands near your lead pocket to achieve a high ball flight.
Practice Makes Perfect
Like any golf skill, hitting high chip shots takes practice to master. Consistently practicing the setup and swing adjustments mentioned above will help you build confidence in using this technique during actual rounds.
By incorporating these setup and swing techniques into your chipping routine, you’ll be able to elevate your chip shots with ease. Whether it’s using an open clubface, adjusting your hand positioning, or changing your wrist mechanics, mastering high chip shots can help you navigate tricky situations on the course with precision. Happy chipping!